
How to Log into Azure for Students / Azure Dev Tools for Teaching
The following instructions will guide you through the steps needed to download software from our Microsoft for Students / Azure Dev Tools for Teaching system. The system is available to active students enrolled in an MIS course or program, and MIS department faculty and staff.
If you need run into technical issues or need further assistance, please refer to the Technical Support section below.
Using Microsoft Azure for Students / Azure Dev Tools for Teaching
To download software from Azure Dev Tools for Teaching:
In your browser, visit https://aka.ms/devtoolsforteaching. Click on Sign In.
Image
You will be sent to a Microsoft Sign In page. Put in your UA e-mail address (NetID@arizona.edu) and click Next.
Image
You may receive a prompt asking you to select if your account is a Work or School account, or a Personal account. Select Work or School account.
Image
You will be redirected to a UA-branded Microsoft sign-in page, unless you're already logged in. Enter your NetID password and click Sign in.
Note: You may be prompted to sign-in with NetID+, two-factor authentication. Be sure to do that to continue the login process.Image
You will then be redirected to an Azure for Students sign-up page, which requires you to provide a billing address. This billing address would be used if you exceed the free Azure credits you receive, and you wanted to sign-up to get more with your credit card. But it isn't required to provide your credit card to get started.
Image Image
Image
You will need to successfully handle CAPCHA(s) and tick the box I represent that I am the individual identified on the account to proceed.
Image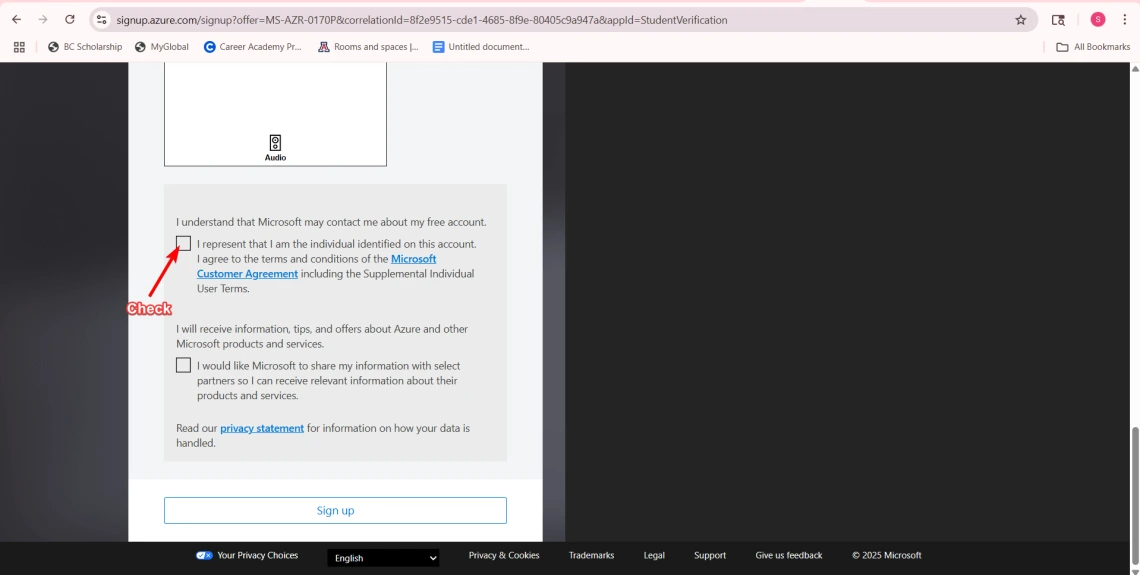
6. You will need Microsoft's MFA app, Microsoft Authenticator, set up for your University Microsoft account to proceed. If you haven't done that, you will be prompted now to set it up.
Image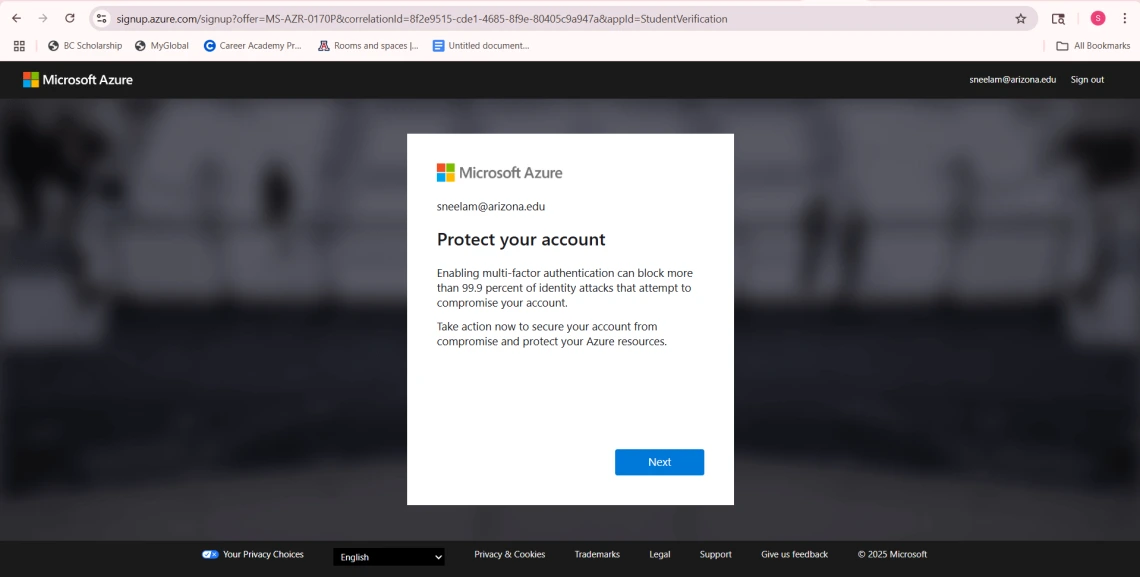
Once you have set up the app, you will be given a challenge, like inputting a number, that you need to complete to proceed with authentication.
Image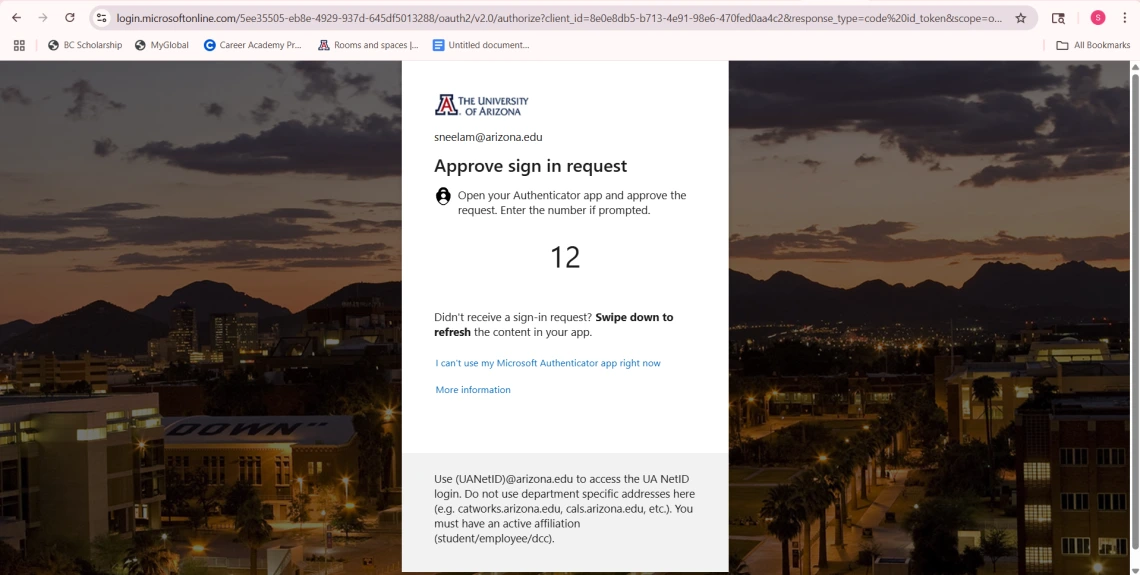
NOTE: If you have trouble setting up Microsoft Authenticator with your University Microsoft account, please contact the 24/7 IT Support Center for assistance. They can escalate and help with this issue.
7. You should be redirected to the Azure Education | Overview page. To look for software downloads, click on Learning Resources -> Software in the left-hand navigation menu to see the list of software to download.
Image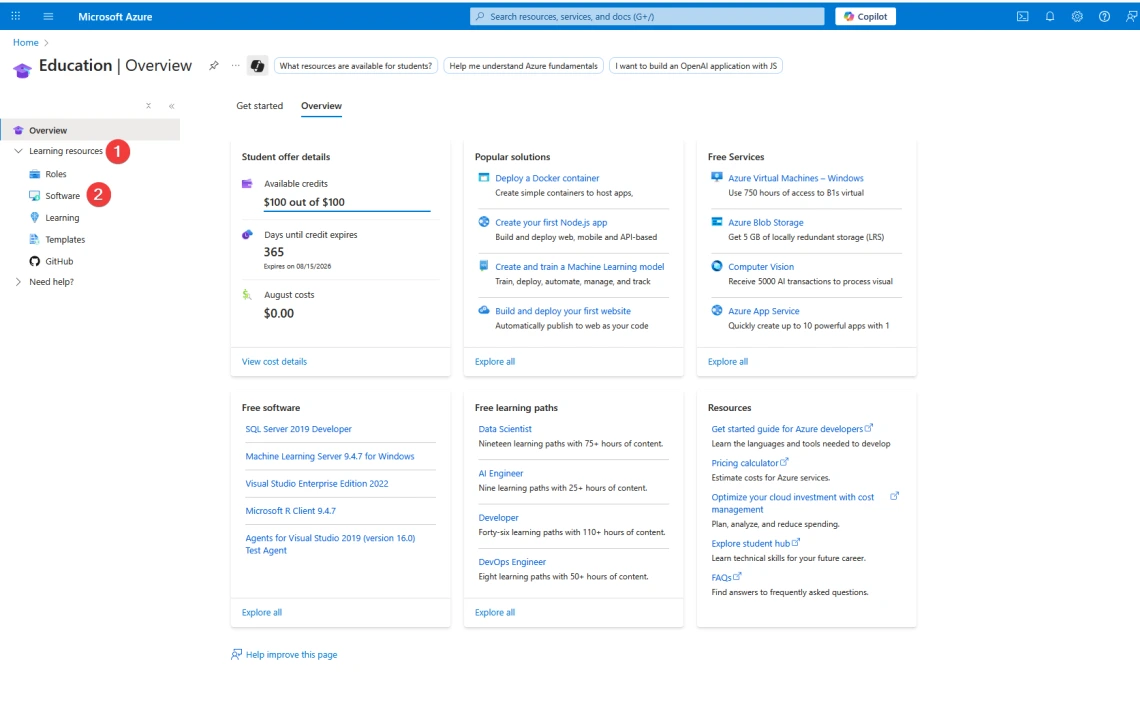
8. You will be able to search for software titles in the Search field. You can search for software like Visio, Project, Access or Windows Server.
Image
At this point, you should be able to download software for installation.
Having access issues?
Are you experiencing a "You do not have access" error, and/or an error with a Message Code that begins with "715"?
If so, please submit a ticket with the Microsoft Azure Dev Tools for Teaching support team via their webform, so they can individually verify your status and resolve your issue. Be sure to use your University of Arizona e-mail address when filling out the form.
Still having trouble?
Did you follow all the steps, but you either cannot see the software required or you cannot generate a license key?
Sometimes, the Azure Dev Tools for Teaching site will require additional student verification.
Here's how we suggest you force this to occur:
- Close all of your browser windows.
- Restart your browser in a Private, InPrivate or "Incognito" mode. Note: We recommend Chrome, if available, for this.
- Visit the student verification link: https://signup.azure.com/studentverification?offerType=3
- Enter your full UA e-mail address. If prompted, choose "Work or School account"
- You should be directed to log in with your NetID (and NetID+ 2nd factor authentication). If you're not, you may be prompted to fill out a form where you're e-mailed a verification link
- Retry the instructions.