Installing Windows and Office 365 in a VM on a Mac
Important note: Apple Macs with M-series ARM-based processors do not support standard Intel-based x86/x64 Windows installations. If you have an M1/M2 Mac, you will not be able to install or run Windows virtual machines on your Mac using the guide below.
The following guide describes the steps you might use to create a Windows 10 virtual machine on your Mac computer. This consists of 5 main phases:
- Download Windows 10 from the Microsoft Azure Dev Tools for Teaching site.
- Download and install VirtualBox. The VirtualBox software that allows for the creation of a virtual machine (VM) on a mac.
- Create a new Windows 10 VM using VirtualBox.
- Install Office 365 on the Windows 10 VM. Office 365 includes applications like Access, Excel and Word.
- Install software updates. This will patch Windows 10 and other Microsoft software, like Office 365, to ensure everything is up to date.
Adding a virtual machine to a computer is a complex, intensive process. Technical issues and resource limitations can prevent this process from being successful.
There are many factors which can influence the amount of time required to install a virtual machine. Factors such as free disk space and computer account privileges can potentially result in this process taking additional time. Please allow enough time to troubleshoot any issues that you may encounter.
If you run into technical issues or need further assistance, please refer to the Technical Support section below.
Phase 1: Get Windows from Azure Dev Tools for Teaching
To download Windows 10 from Microsoft's Azure Dev Tools for Teaching website:
- Follow steps 1-5 from our How to Log On to Azure Dev Tools for Teaching article to log in and reach the Azure Dev Tools for Teaching Education portal.
In the Search box, type in Windows 10 and hit Enter. You will be shown a link for Windows 10 Education (among other options). Click it to see its details.
Image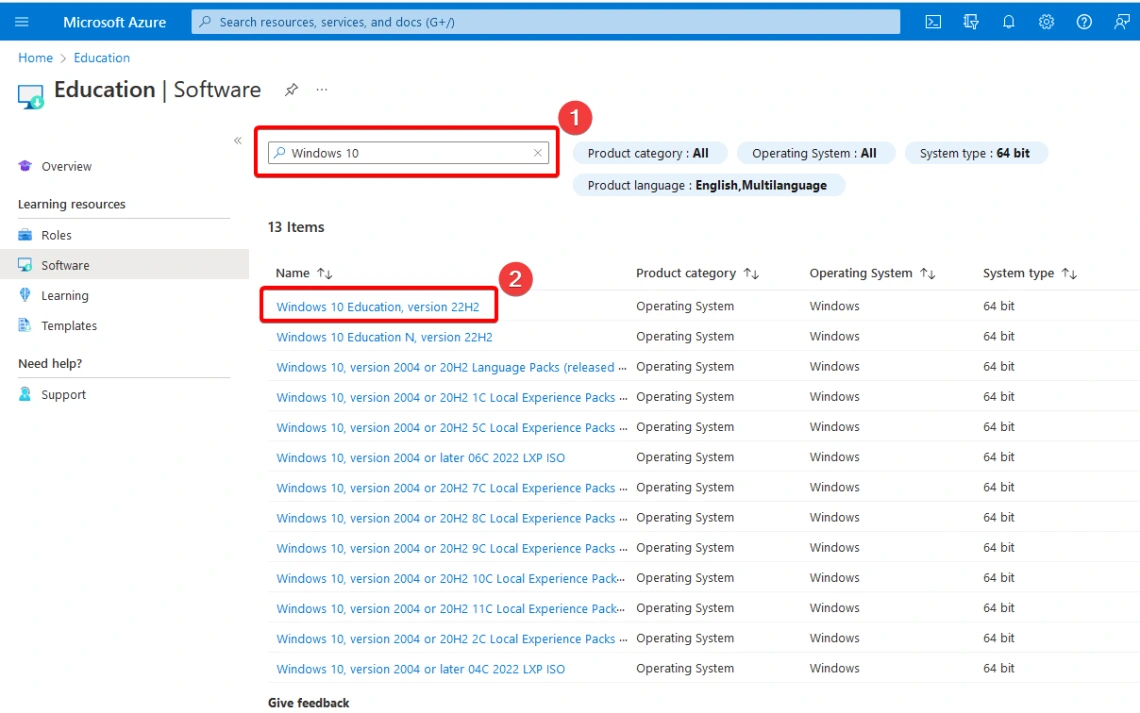
In the right-hand pane, click the button to View Key to generate a Product Key for your licensing of this download. Note your Product Key and save it for future steps and for re-installation in the future. Then, click the Download button to begin your download of Windows 10.
Image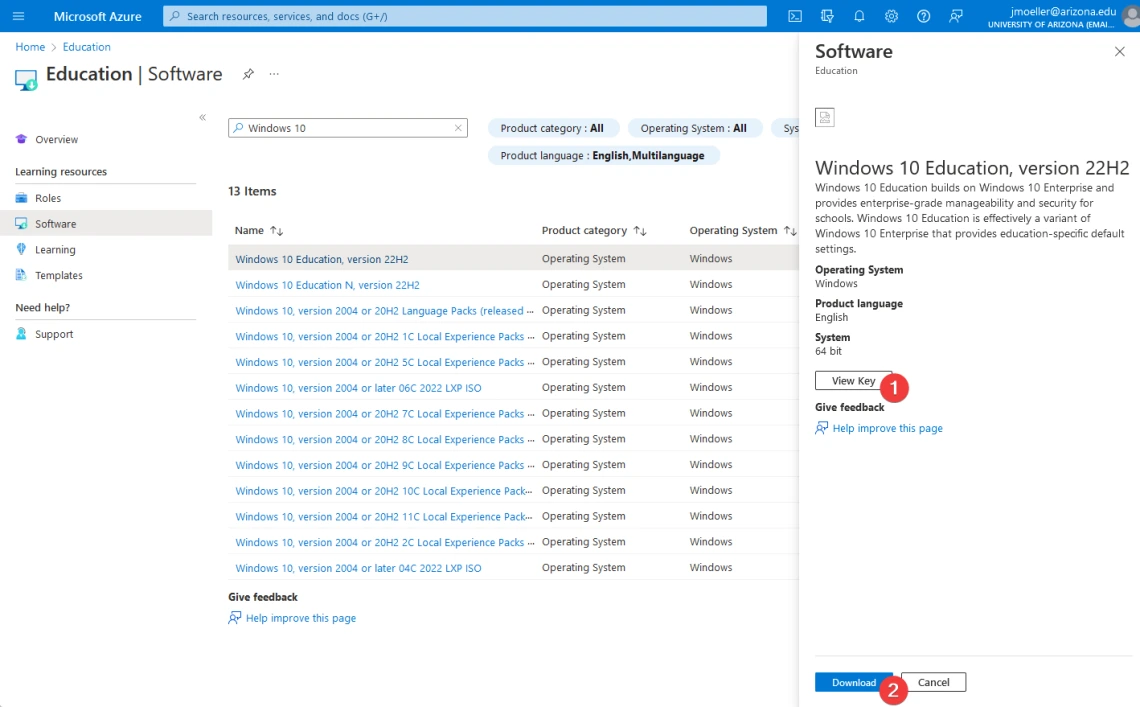
We'll use the download and the Product Key in Phase 3.
Phase 2. Download and Install Oracle VirtualBox
NOTE: If you already have or use a virtualization software, like Parallels or VMware Fusion, and you're knowledgeable of its functionality, you may be able to skip this phase of the instructions and proceed to phase 3, adapting those instructions for the software that you're already familiar with. Our instructions use Oracle VirtualBox because it is popular, free and the UITS 24/7 IT Support Center is familiar with its operation, which may be helpful in case you need assistance.
NOTE: VMware Fusion is available to MIS students and faculty free of charge. Please see our page on the VMware Academic Program for more information.
To download Oracle VirtualBox:
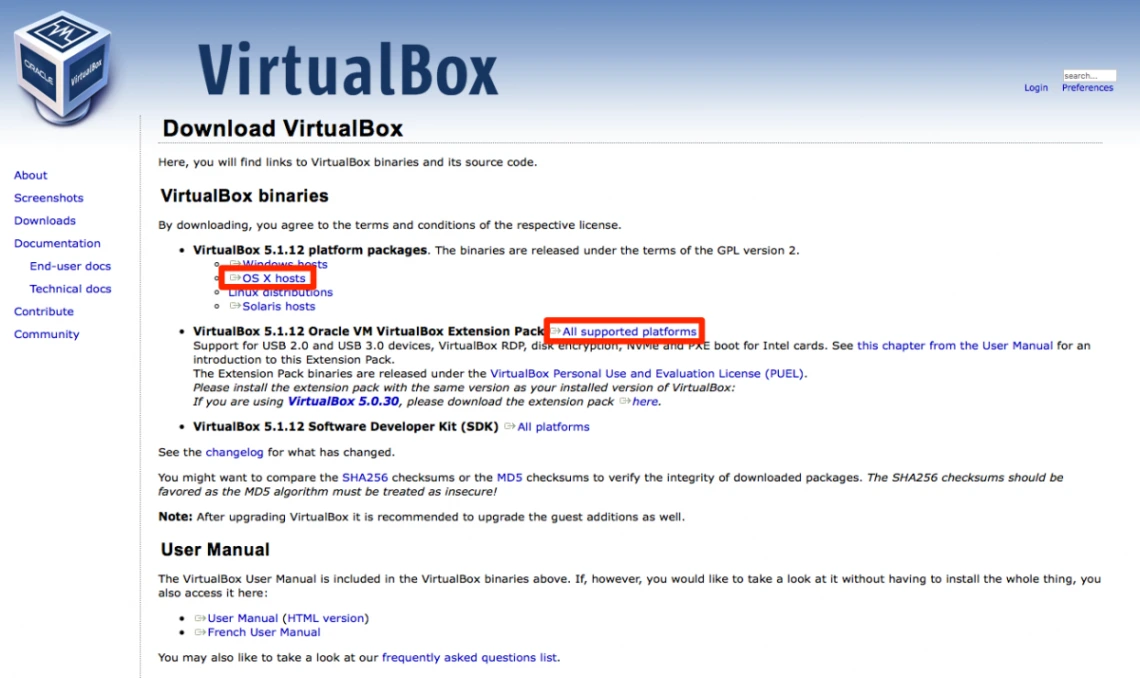
1. Go to the Oracle VirtualBox download page, available at https://www.virtualbox.org/wiki/Downloads.
2. Download 2 items:
-
- The current VirtualBox Platform Package for OS X hosts.
- The current VirtualBox Oracle VM VirtualBox Extension Pack for All supported platforms.
3. When the download is complete, navigate to the location of the two downloaded files.
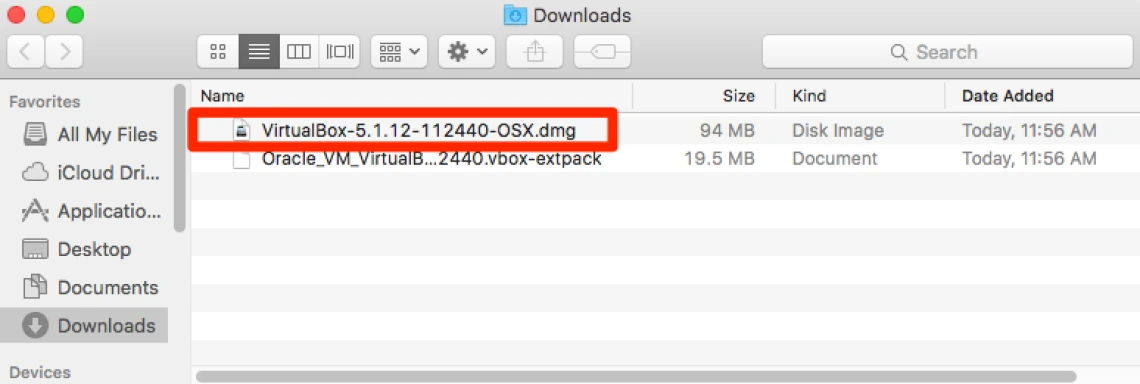
The default location should be the Downloads folder.
Click the VirtualBox.dmg file to begin the VirtualBox installation.
4. Click on the VirtualBox.pkg Icon.
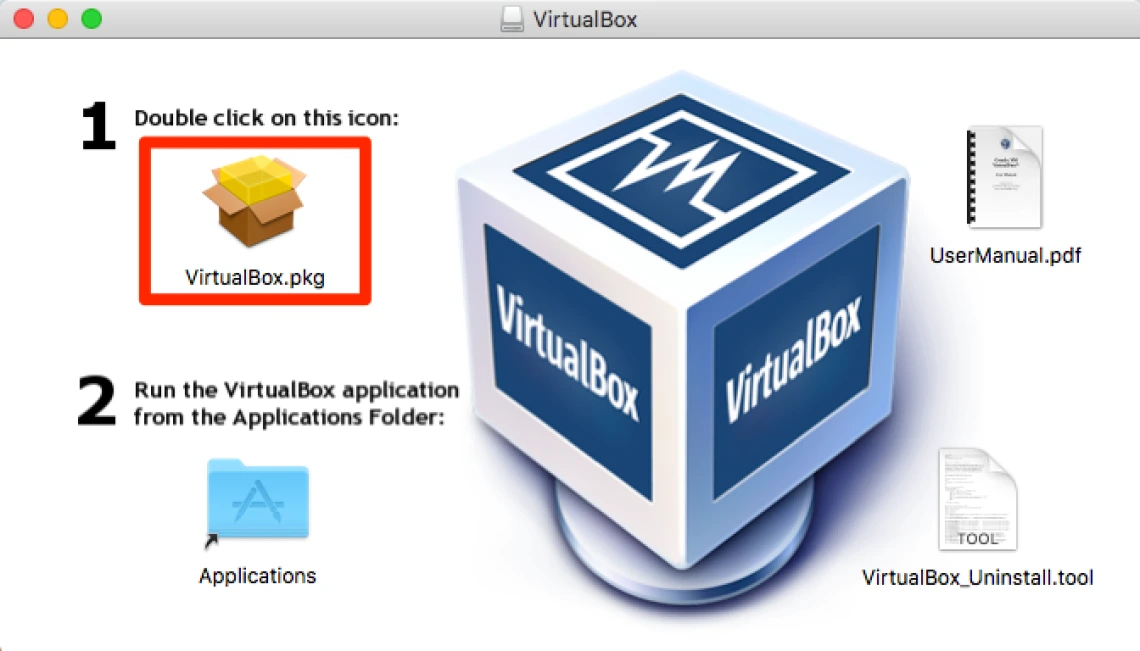
5. Click the Continue button.
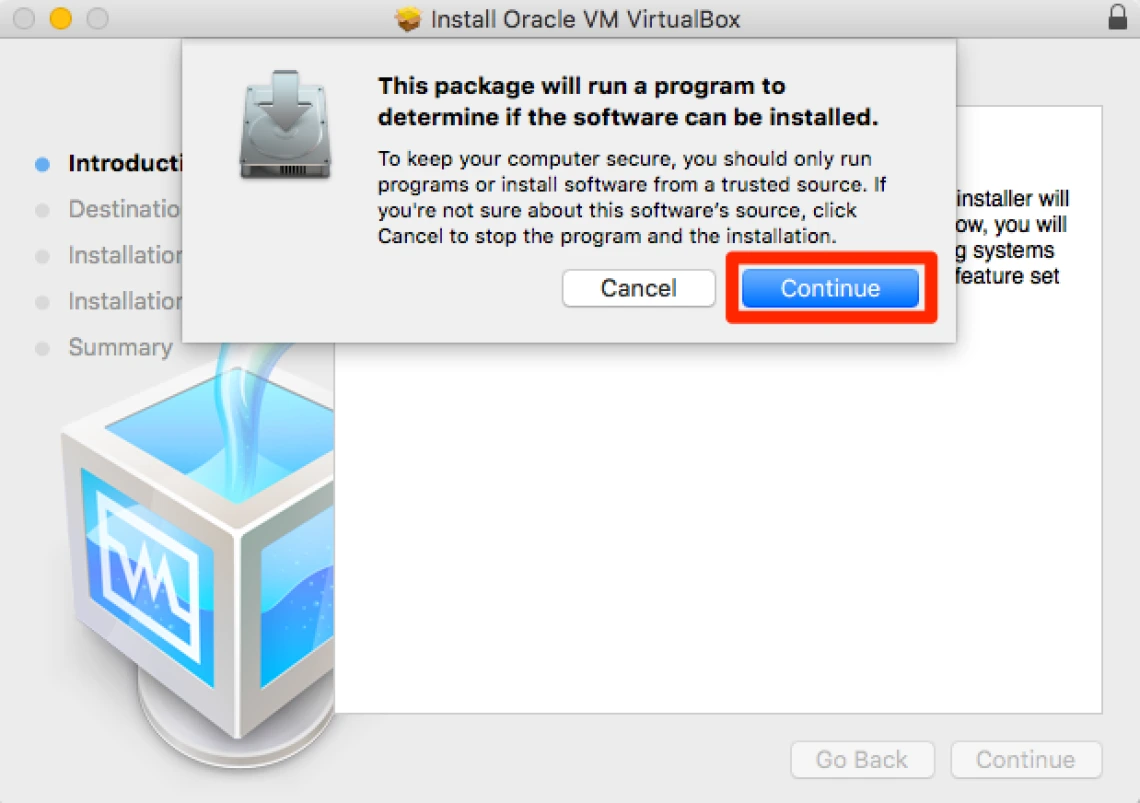
6. Click the Continue button.
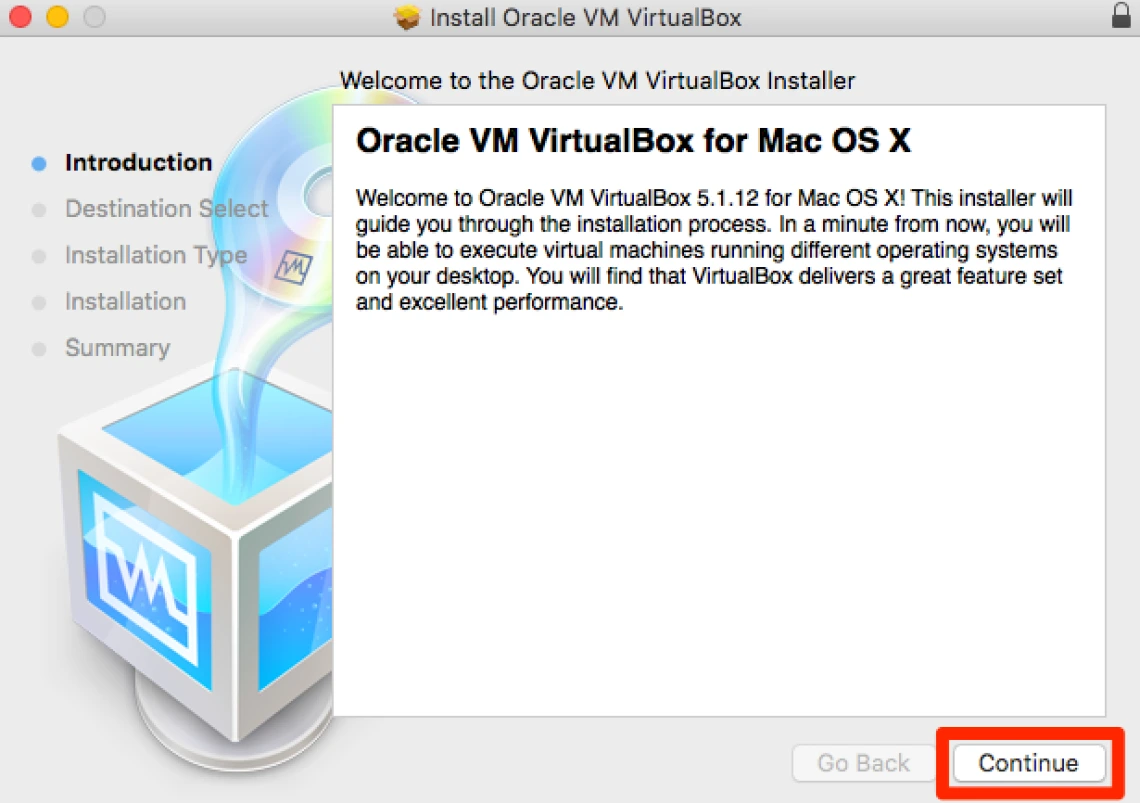
7. Click the Install button.
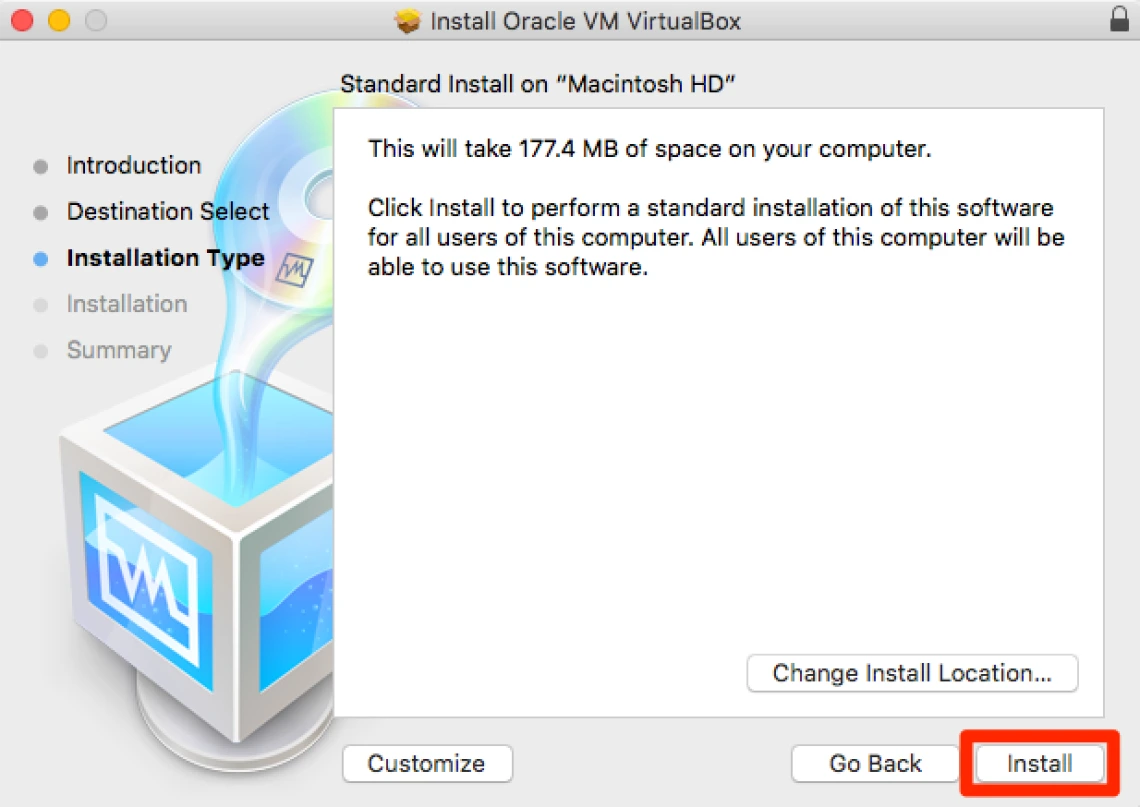
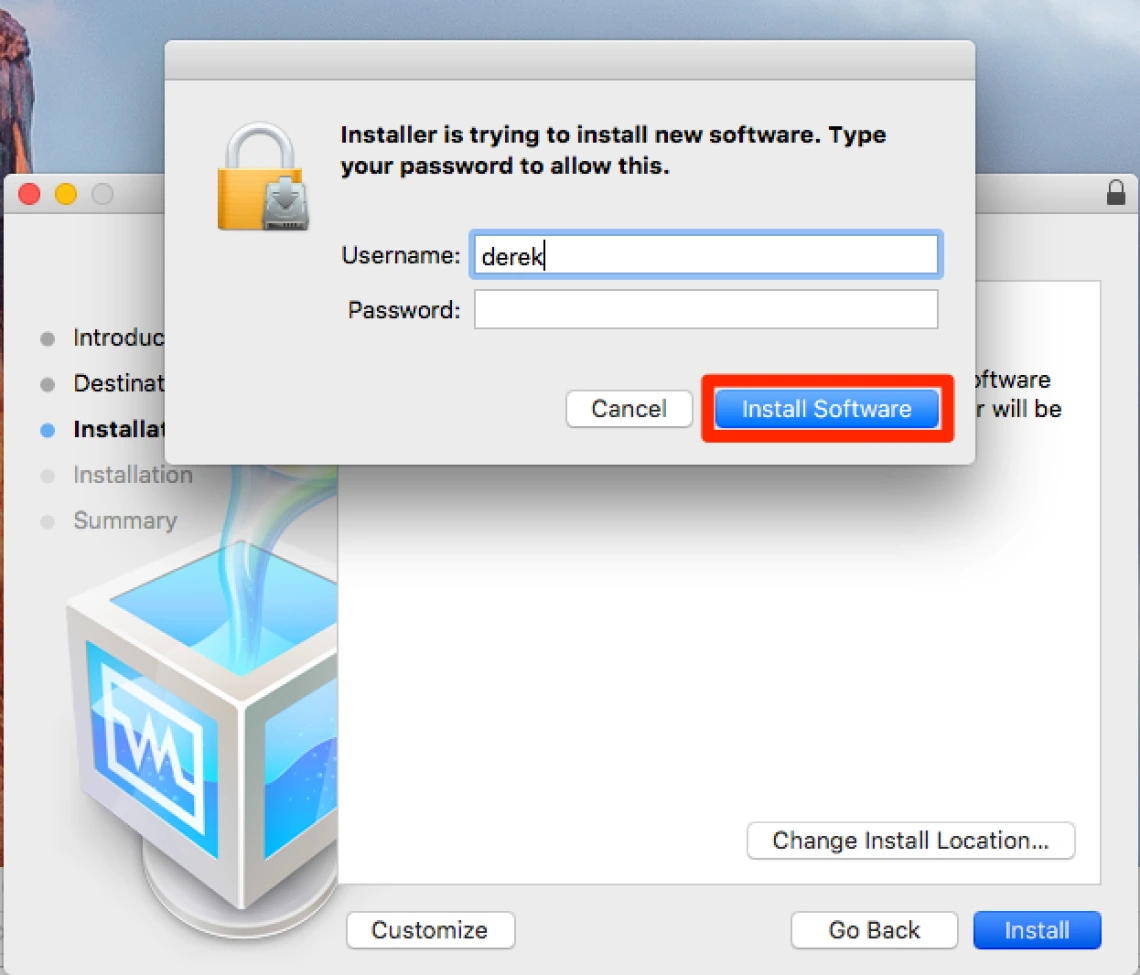
8. Enter the Username and Password for an account on the Mac computer that has administrative privileges, then click the Install Software button.
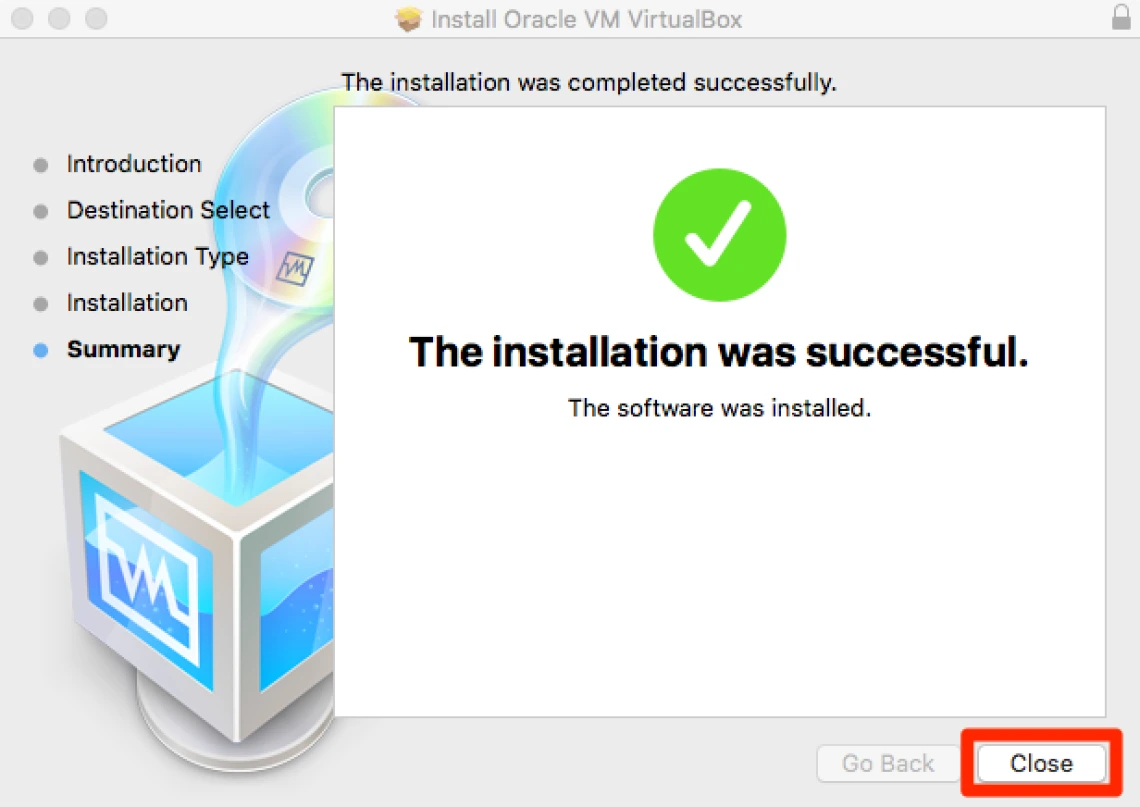
9. When the installation completes successfully, click the Close button.
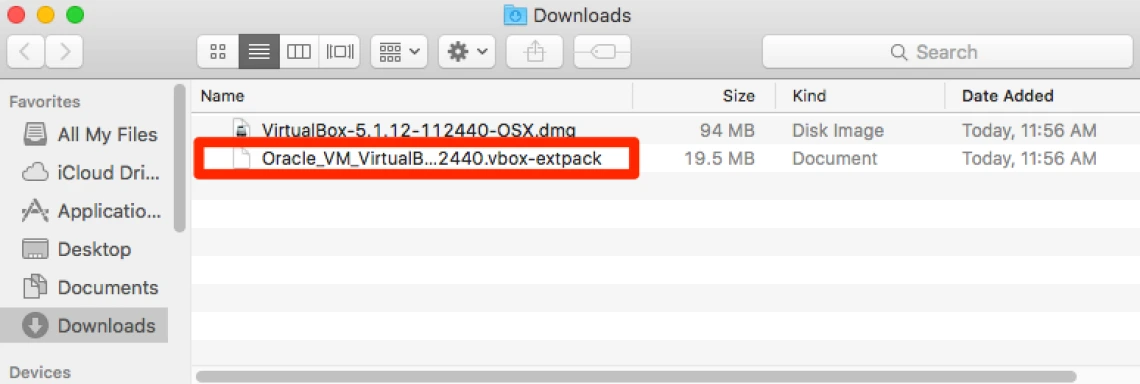
10. Return to the download location used earlier. Now we can install the VirtualBox VM Extension Pack.
Click on the Oracle_VM_VirtualBox.vbox-extpack file.
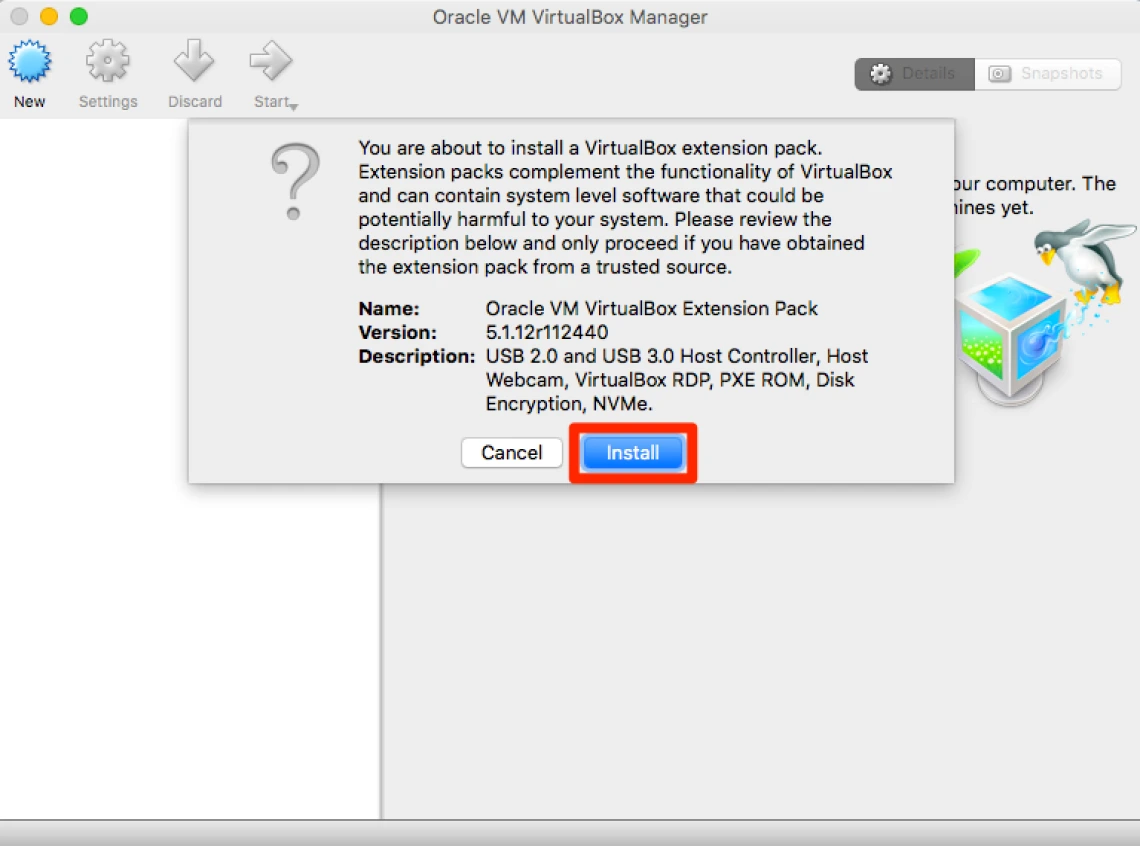
11. Click the Install button.
12. Click the I Agree button to accept the license agreement.
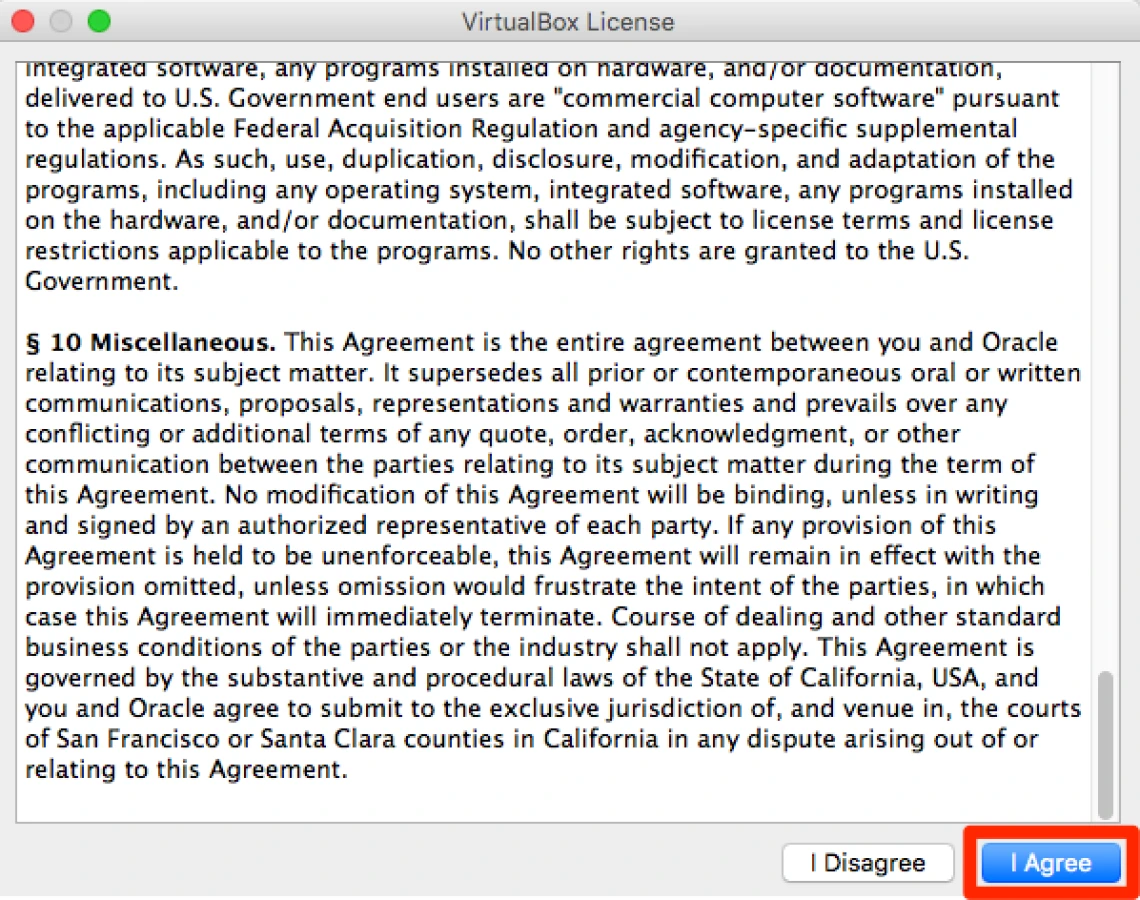
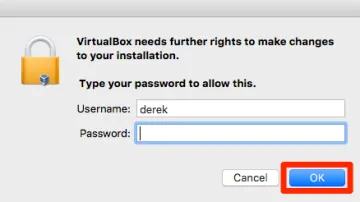
13. Enter the Username and Password for an account on the Mac computer that has administrative privileges, then click the OK button.
14. When the installation completes successfully, click the OK button.
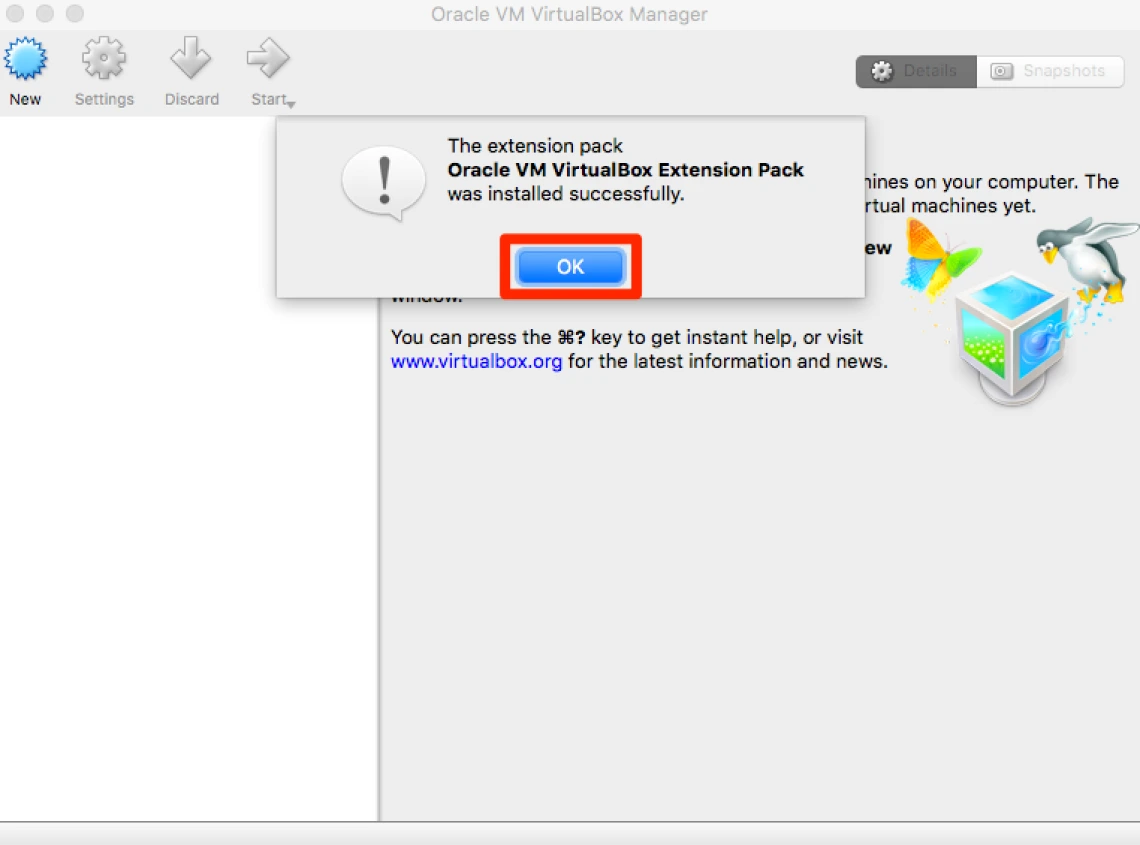
You have now installed VirtualBox and can proceed with creating a Windows 10 VM.
Phase 3. Creating a Windows 10 Virtual Machine in VirtualBox
1. In VirtualBox, click the New button.
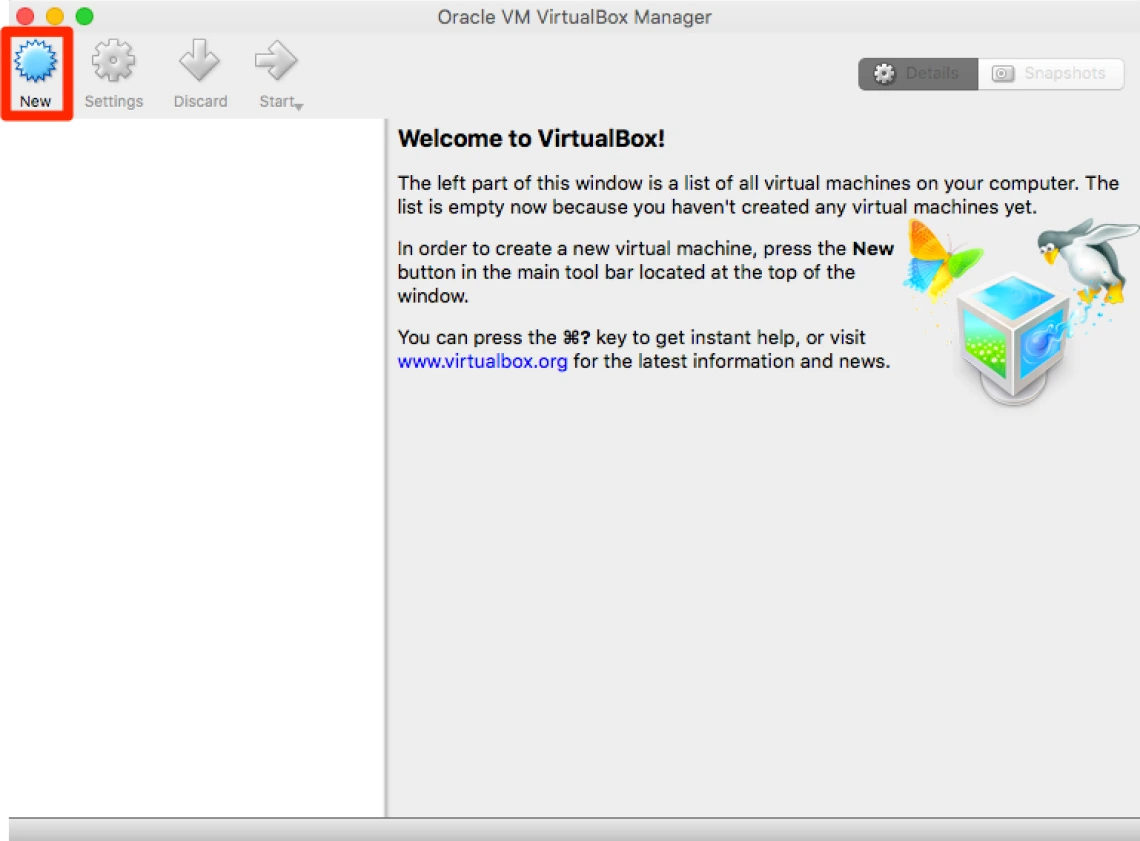
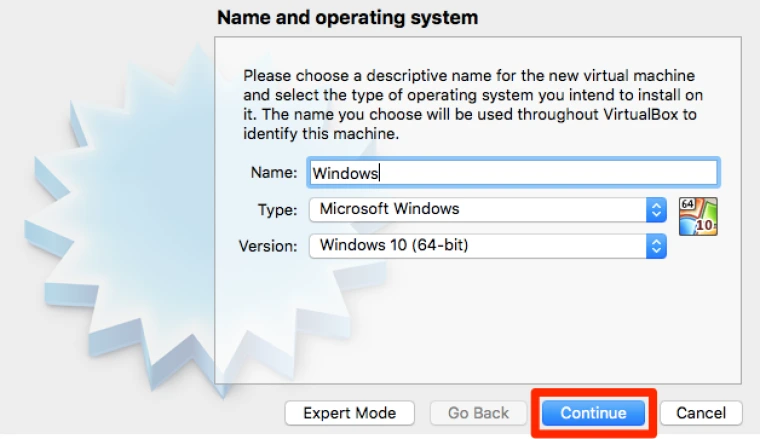
2. Configure the basics of your Virtual Machine.
Name can be anything you choose. In this example, we are naming our VM "Windows".
Type should be Microsoft Windows by default.
For Version select Windows 10 64-bit.
When complete, click the Continue button.
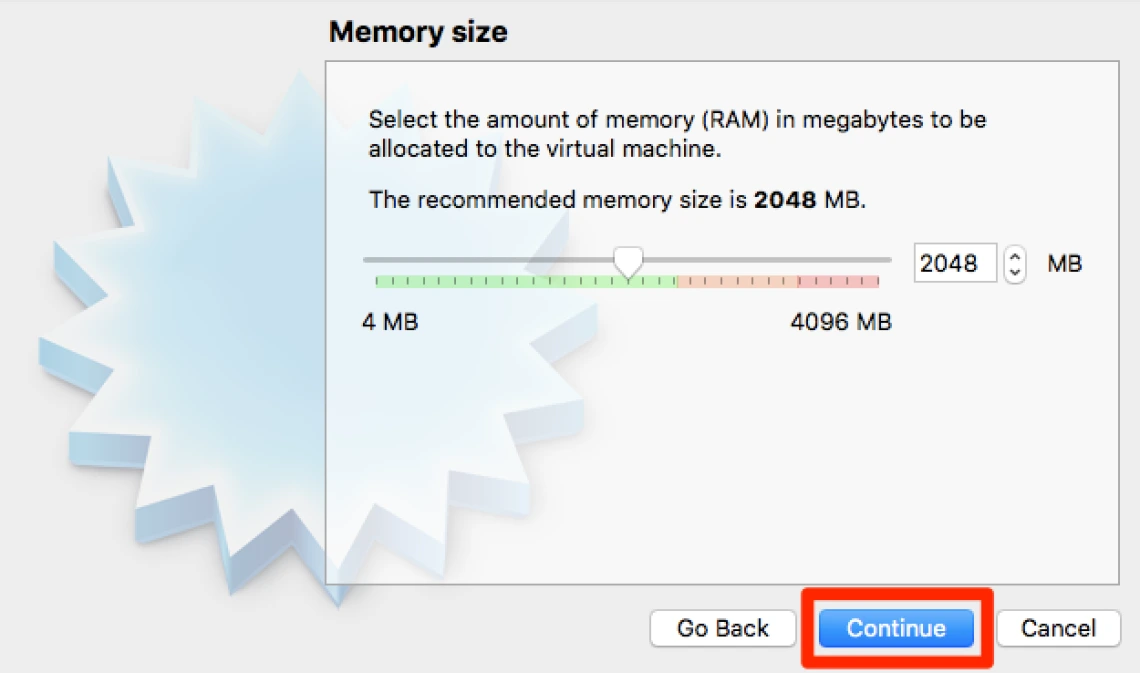
3. Click the Continue button.
NOTE: The amount of RAM allocated to the virtual machine can be adjusted later, but the default setting often works best.
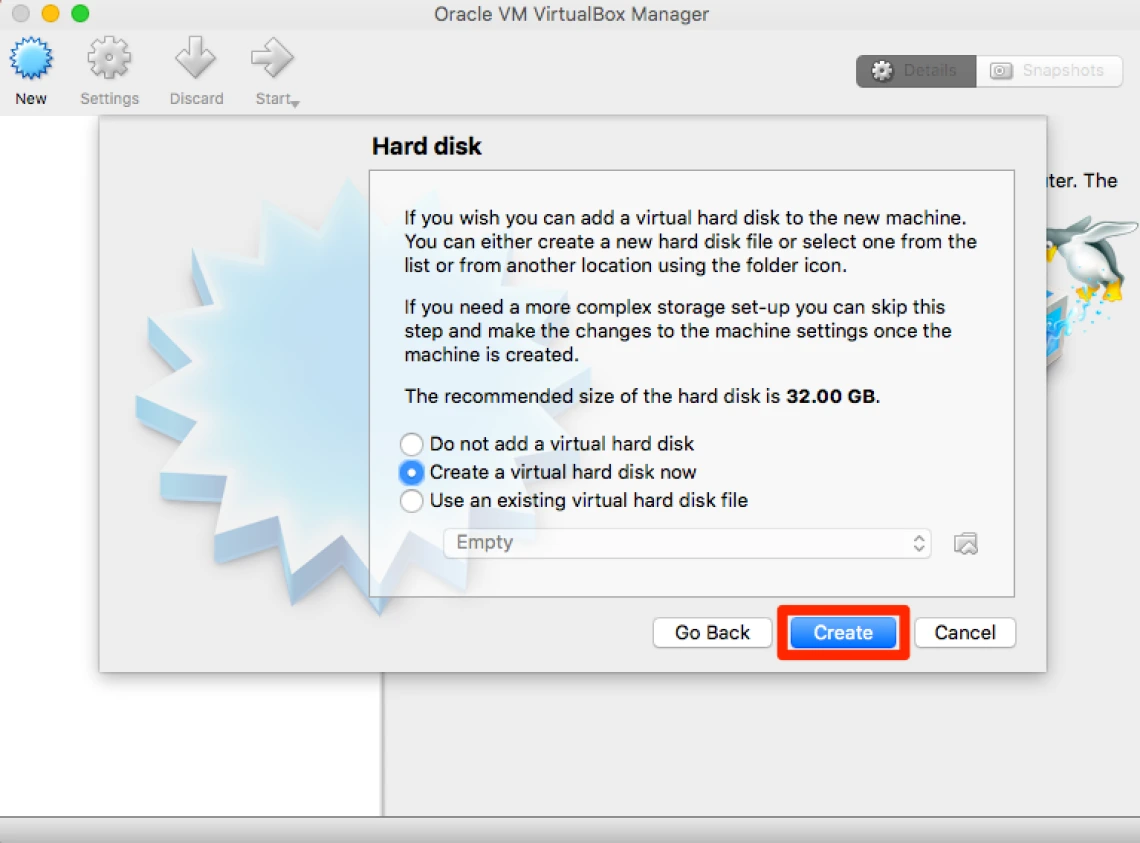
4. Make sure the Create a virtual hard disk now option is selected. Click the Create button.
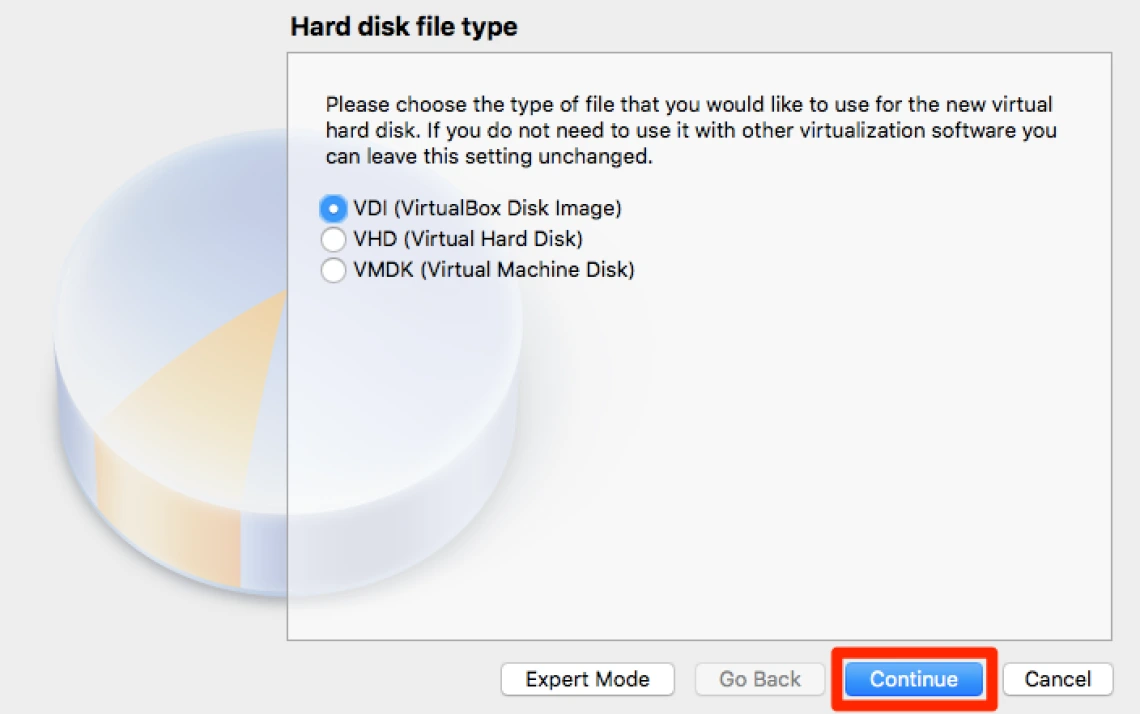
5. Click the Continue button to keep the default VDI file type.
6. Click the Continue button.
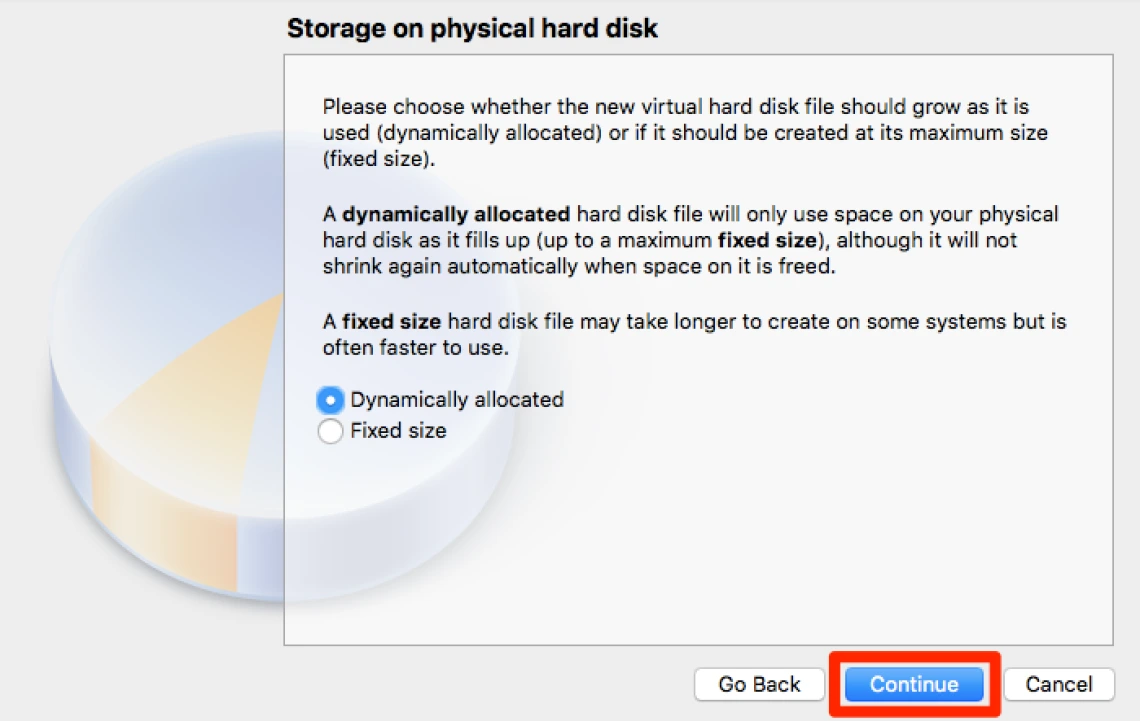
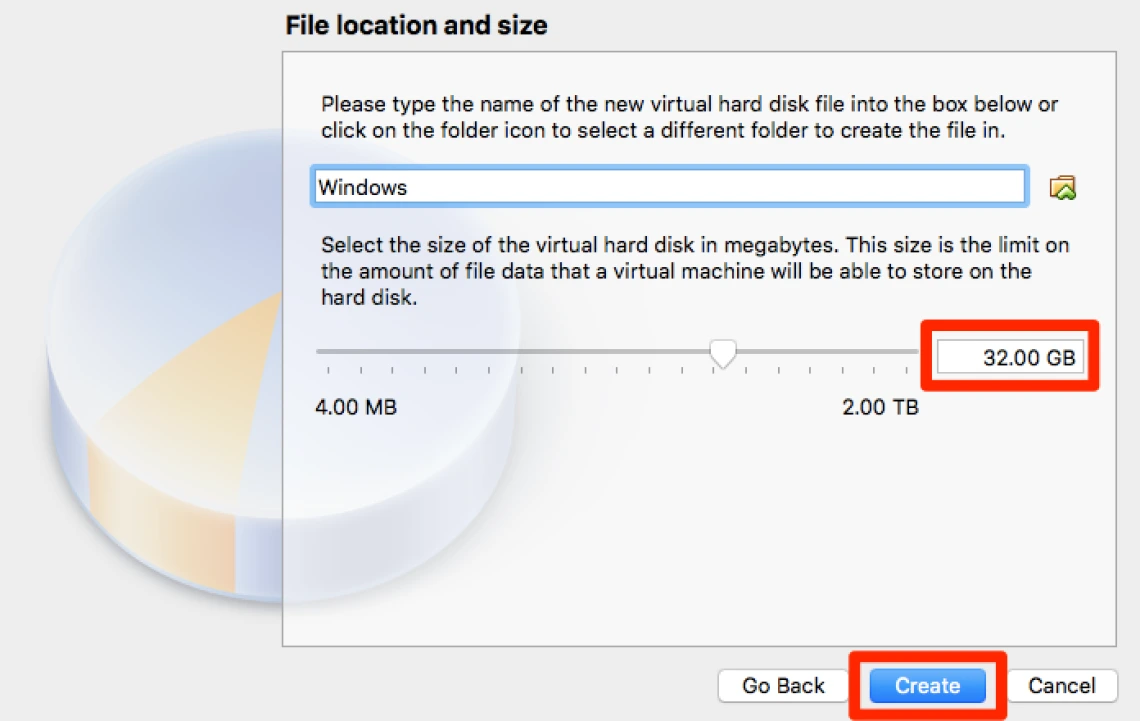
7. Click the Continue button to accept the default suggestion for disk size.
NOTE: The minimum hard drive size of the new virtual machine is set here. Please consider the amount of software that will be used on the VM as the amount of space minimally dedicated to the virtual machine cannot be changed later.
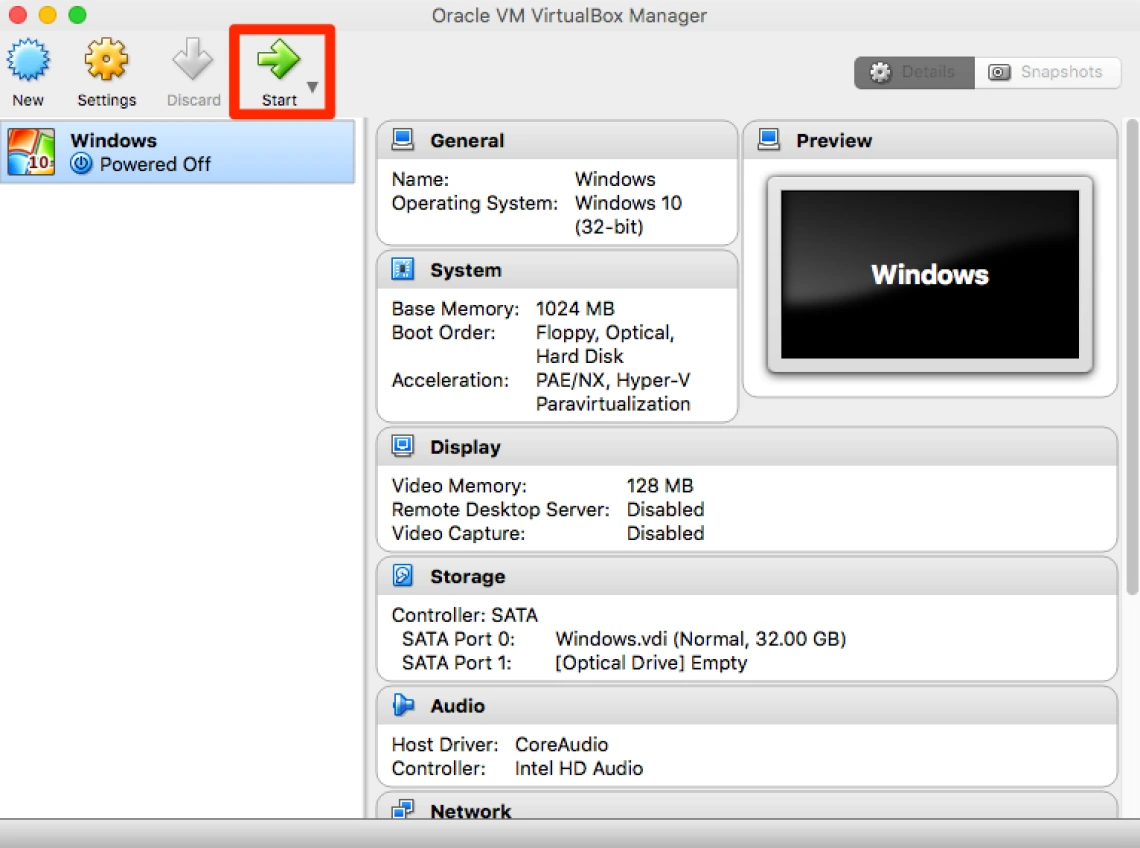
8. Click the Start button to launch the Windows 10 virtual machine.
Note: The start button will be used in the future each time to start the Window 10 virtual machine.
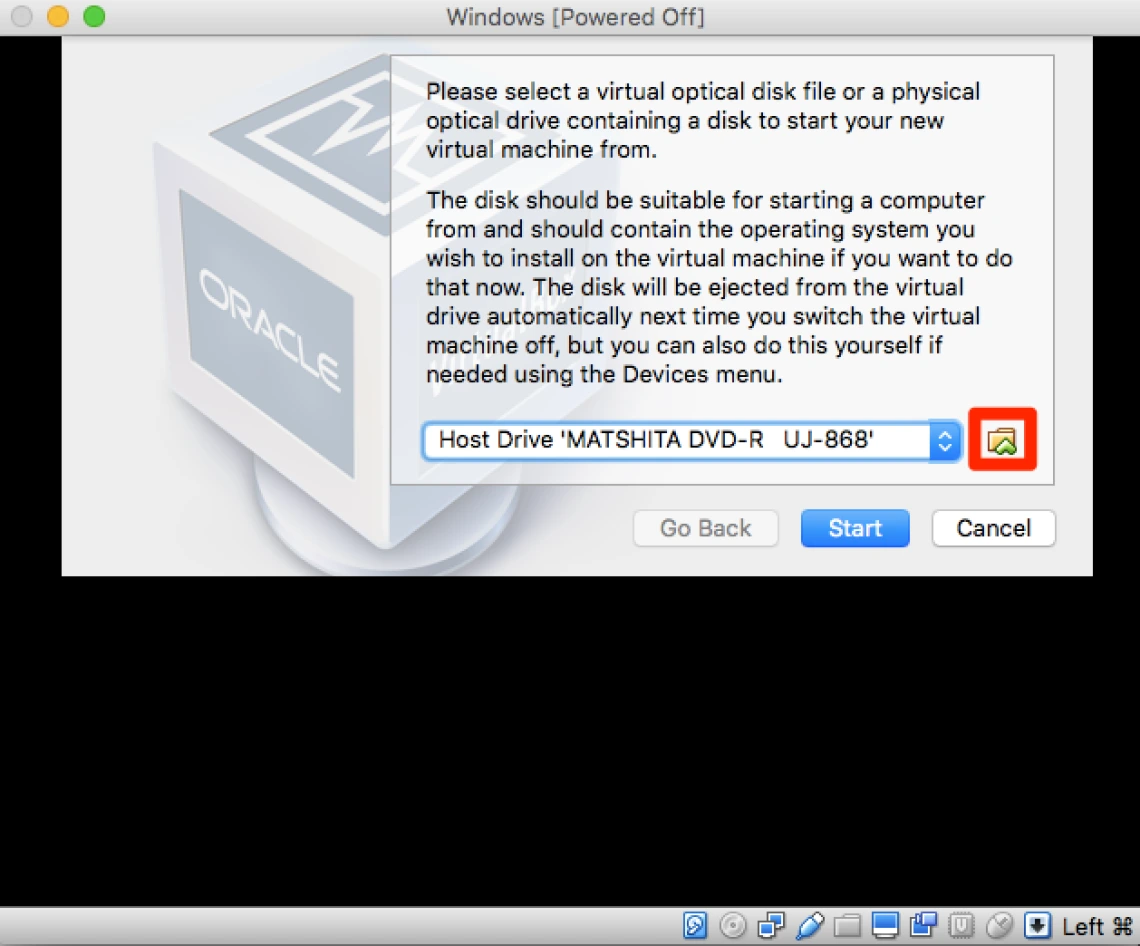
9. Click the Folder Icon to choose an optical disk file.
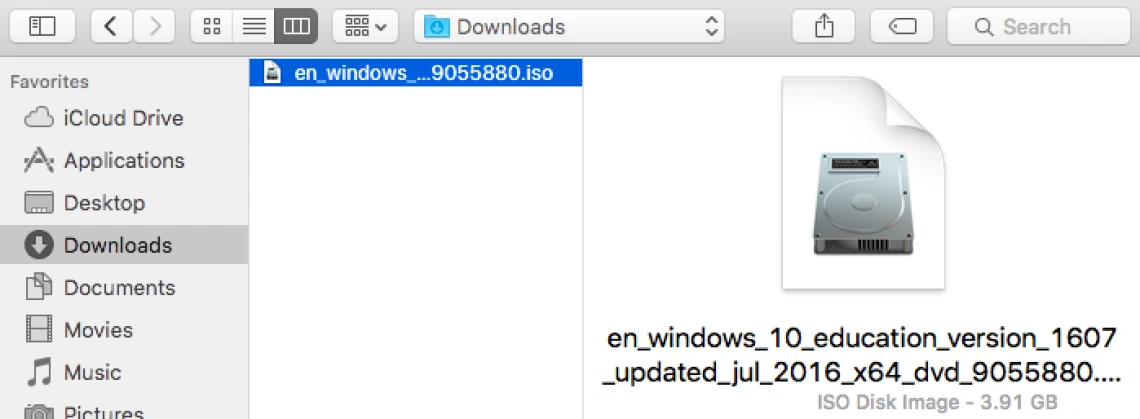
10. Navigate to the location of the Windows 10 Education 32/64-bit (English) download. The default location should be the Downloads folder.
Select the downloaded Windows 10 file.
Click the Open button.
NOTE: If you need to re-download software or get your product key from any previous orders in Microsoft Azure, please see our instructions.
To get your Microsoft Windows 10 please refer to the Phase1 instructions above.

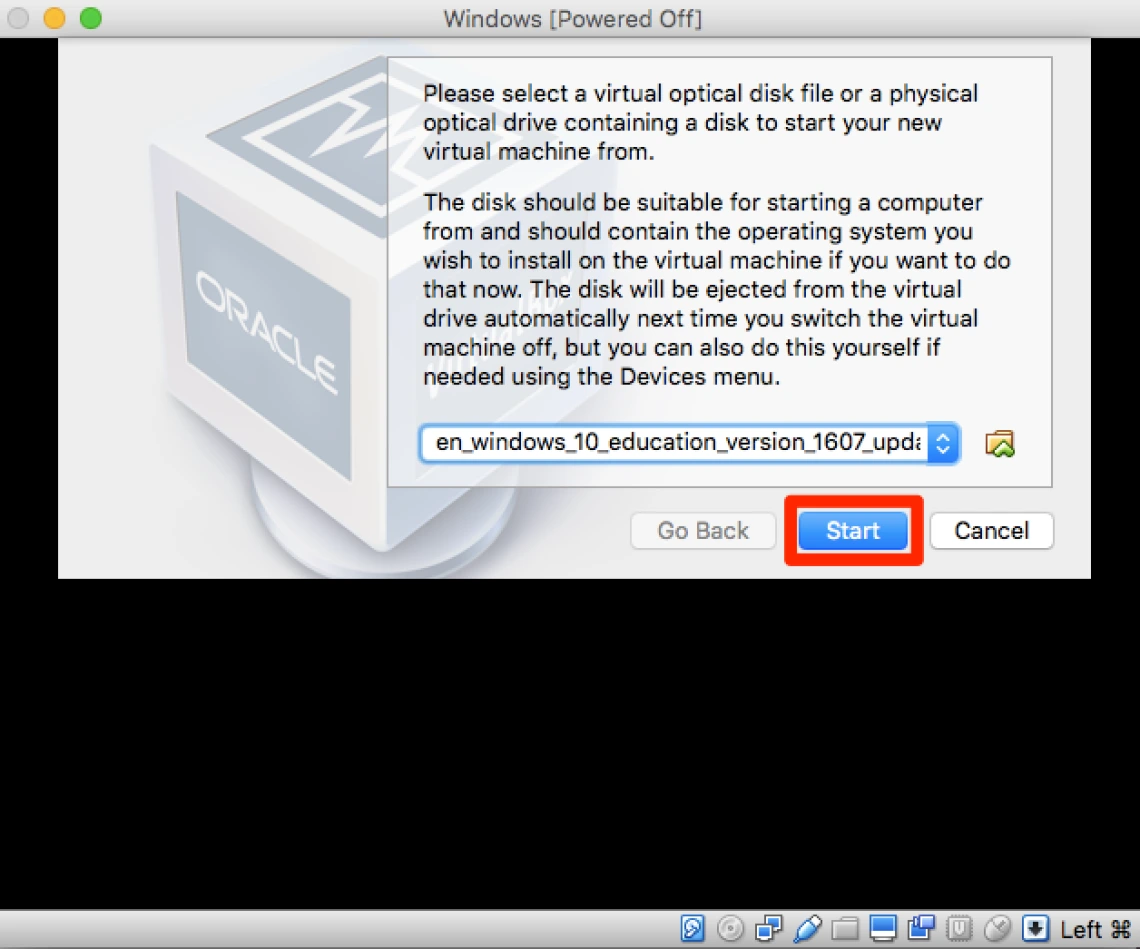
11. Click the Start button to start the new VM and begin installation.
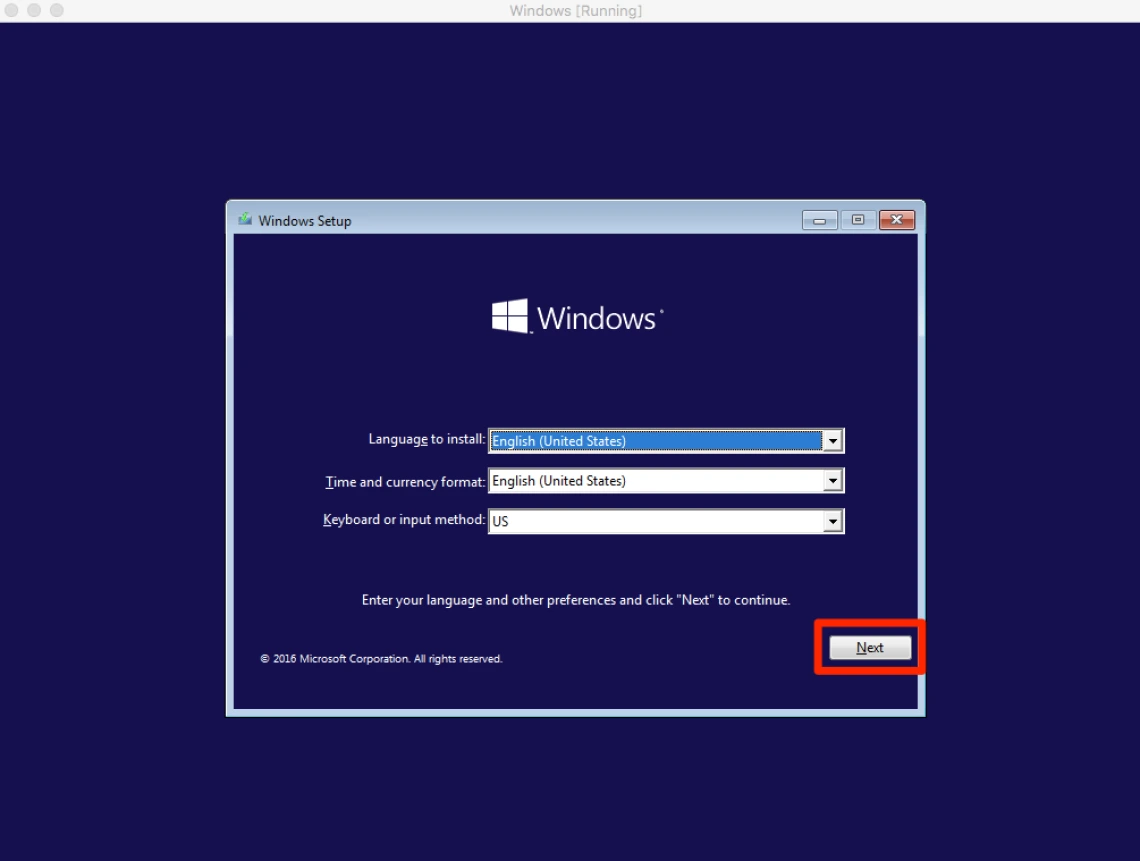
12. Once this screen appears, select language, time, and keyboard options before clicking Next.
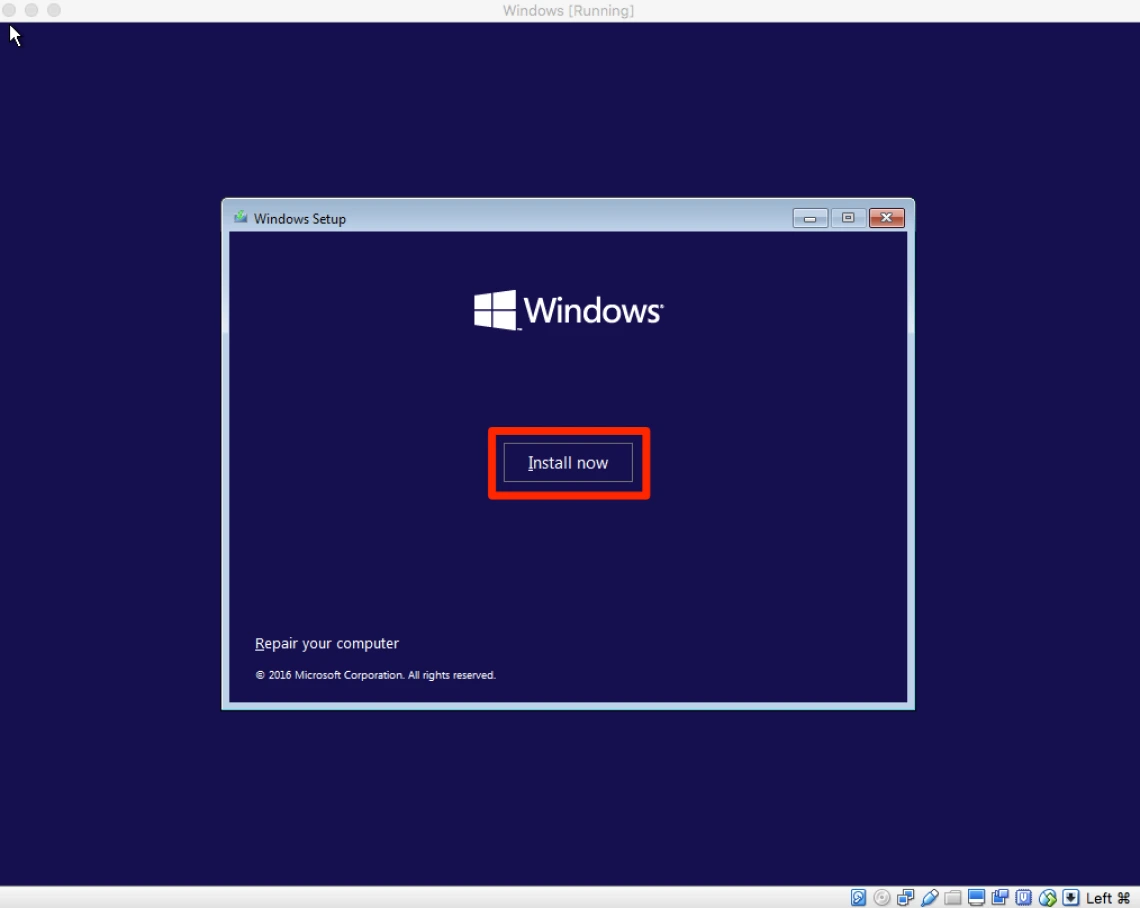
13. Click Install now to begin installing Windows 10 on the Virtual Machine.
14. Enter the Product key that was displayed in the order summary section of the Microsoft Imagine webpage.
NOTE: If you need to re-download software or get your product key from any previous orders in Microsoft Azure, please see our instructions.
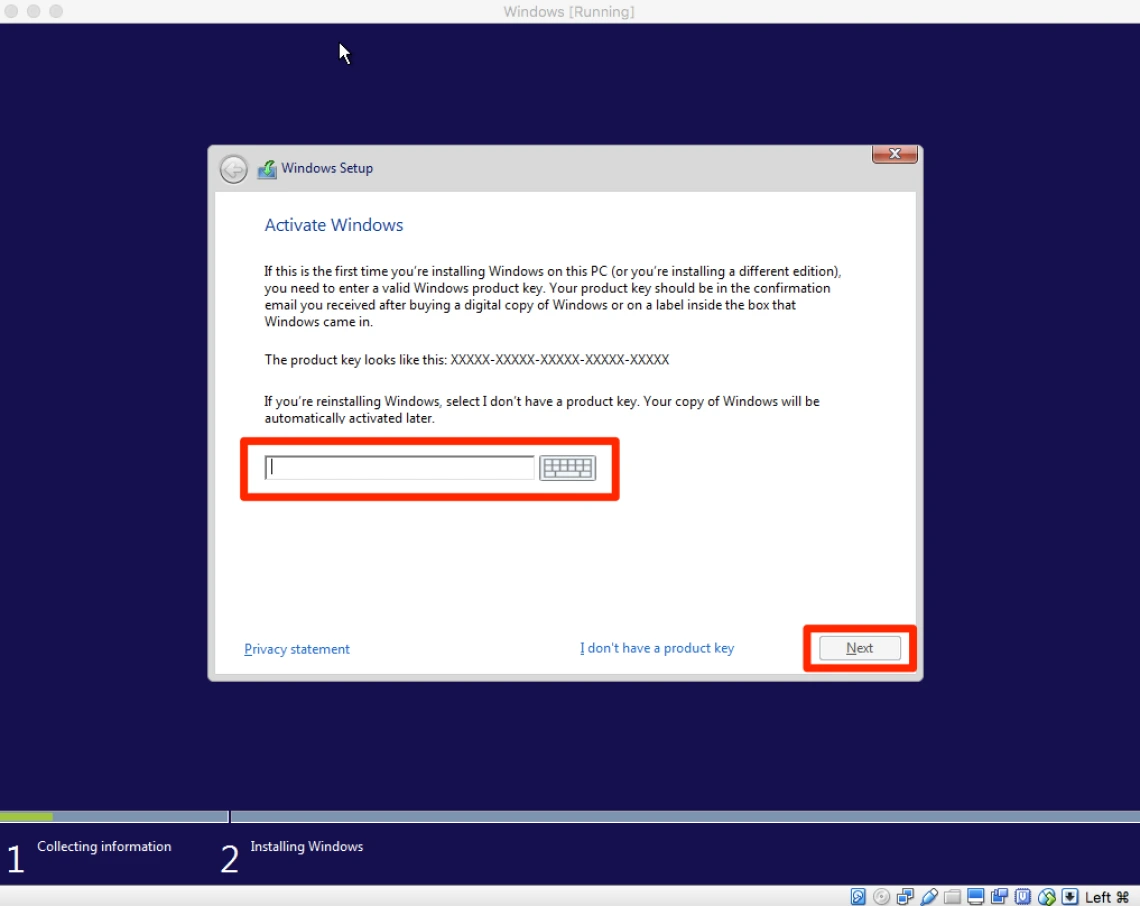
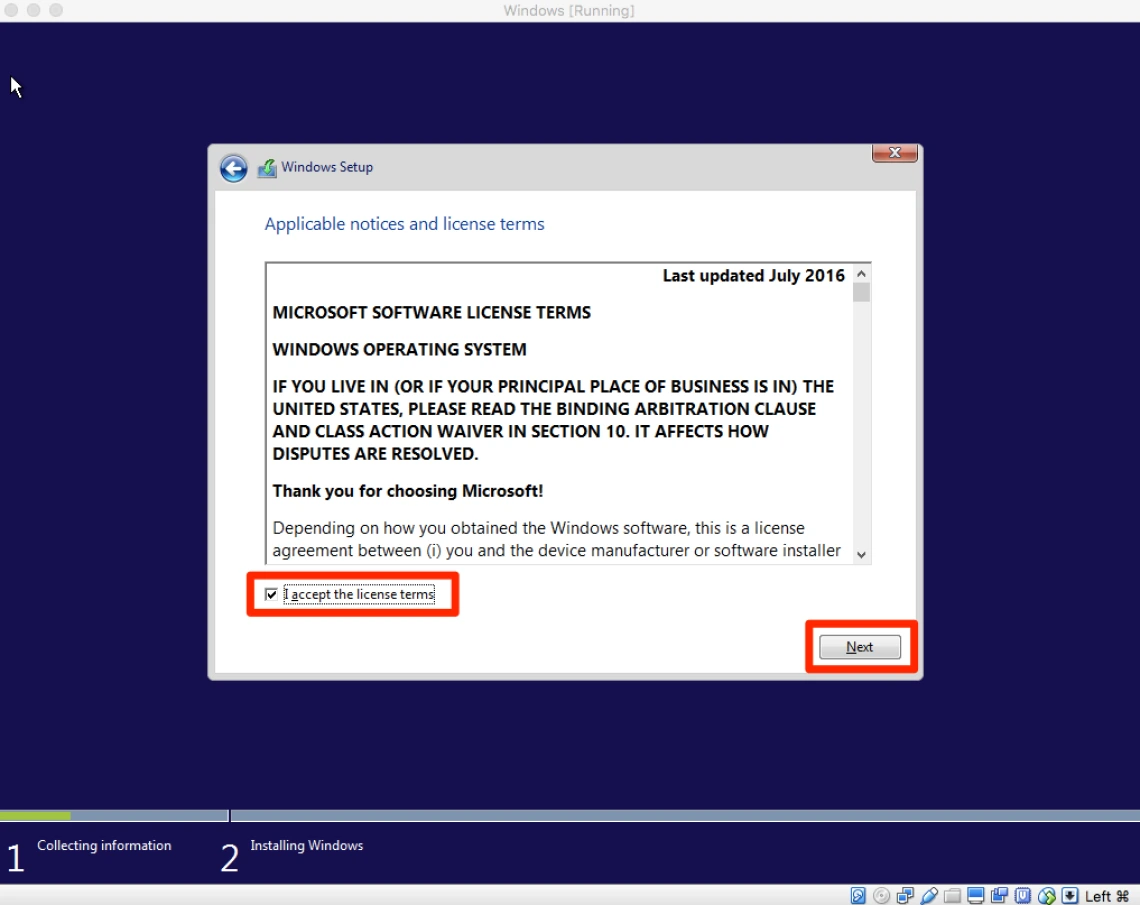
15. Check the I accept the license terms to accept the software license agreement, then Click the Next button.
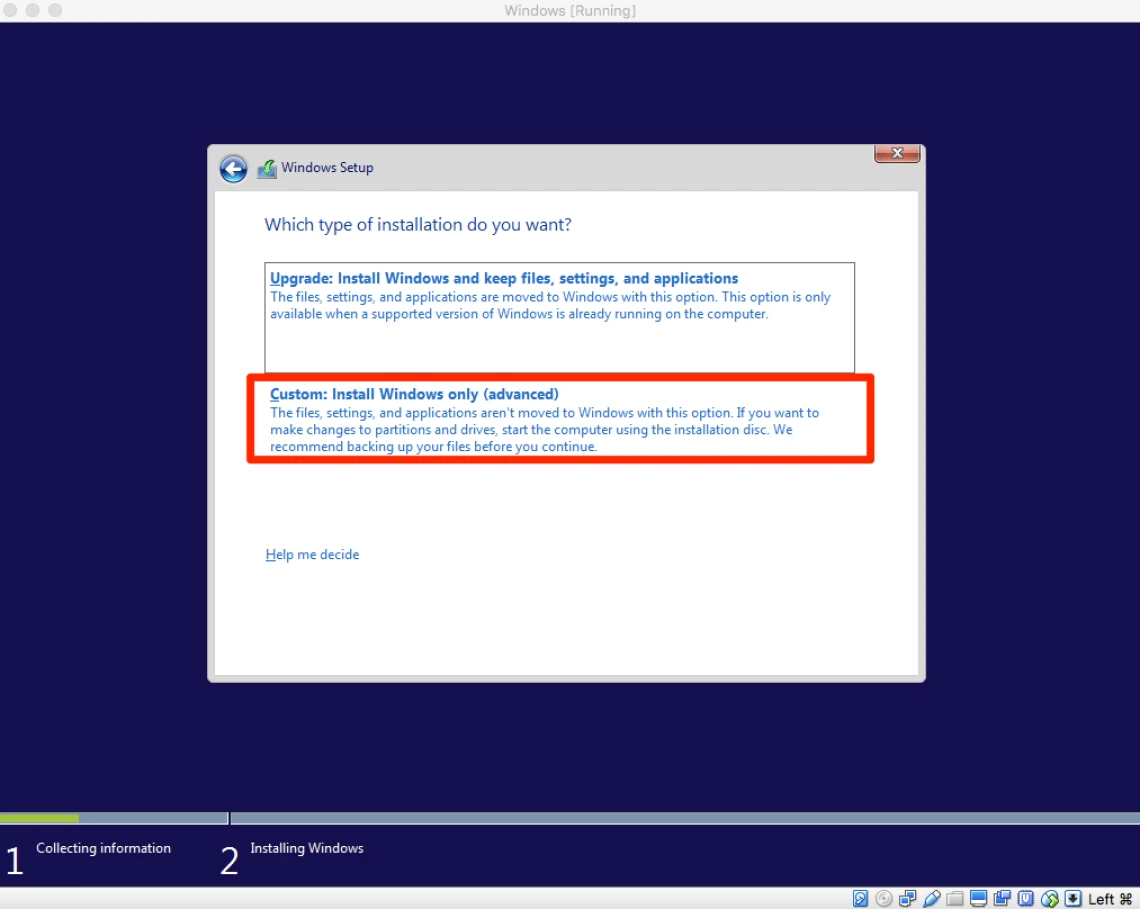
16. Click the Custom: Install Windows only (advanced) option.
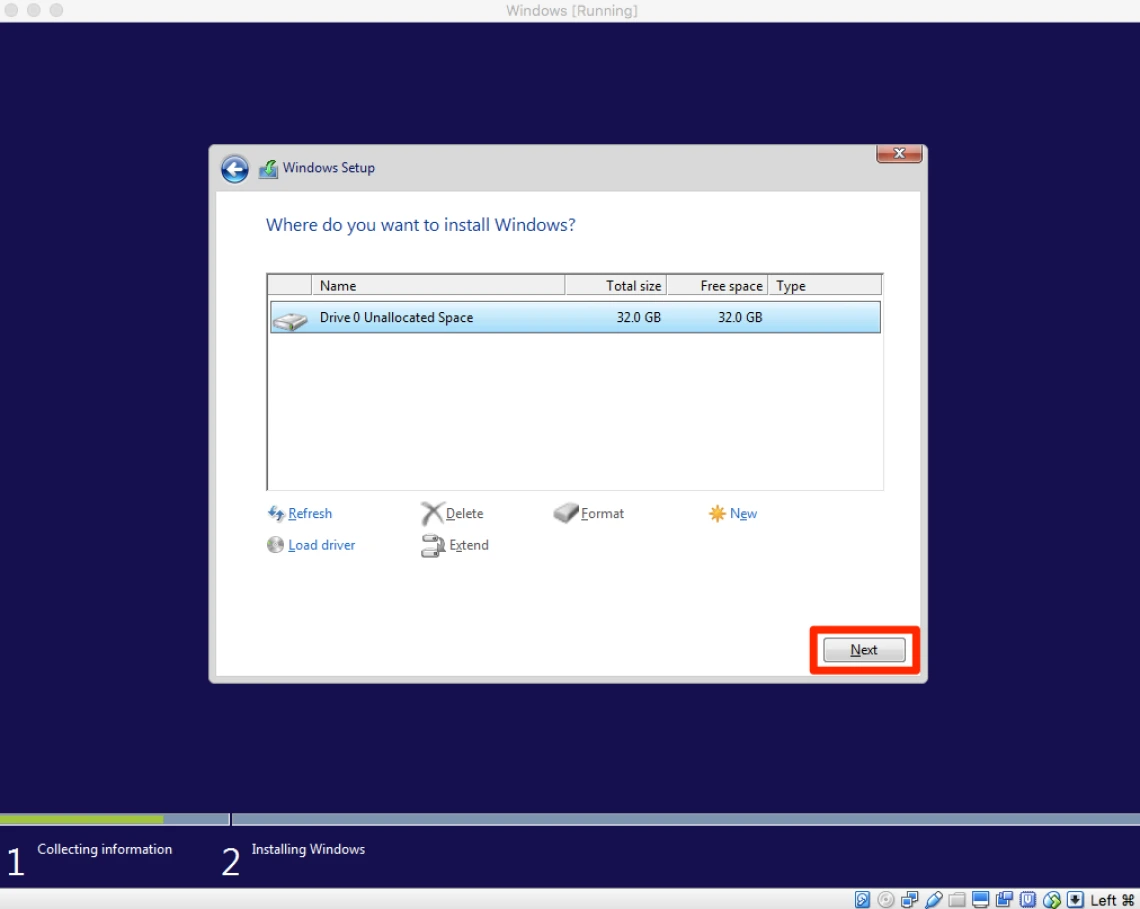
17. Click the Next button to accept the installation defaults.
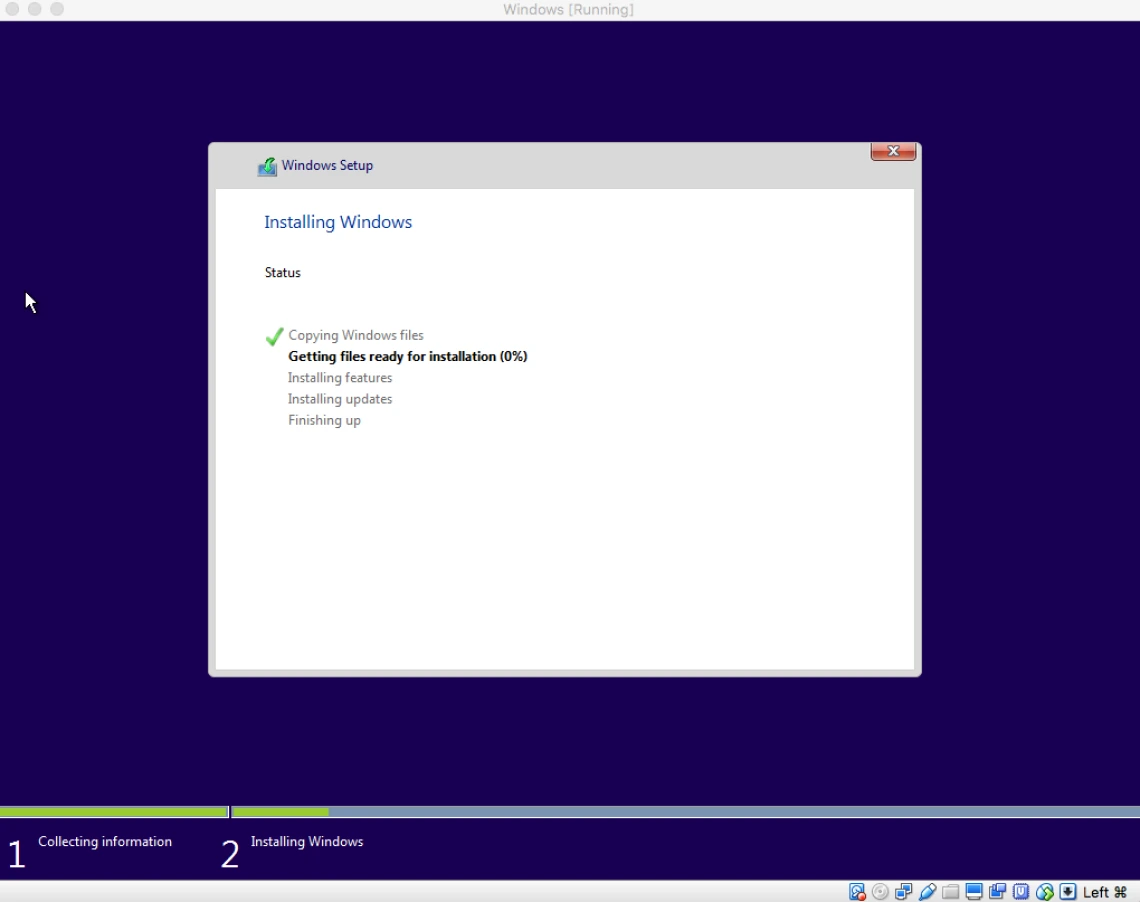
18. Windows 10 is now installing. This can take many minutes, especially on older systems.
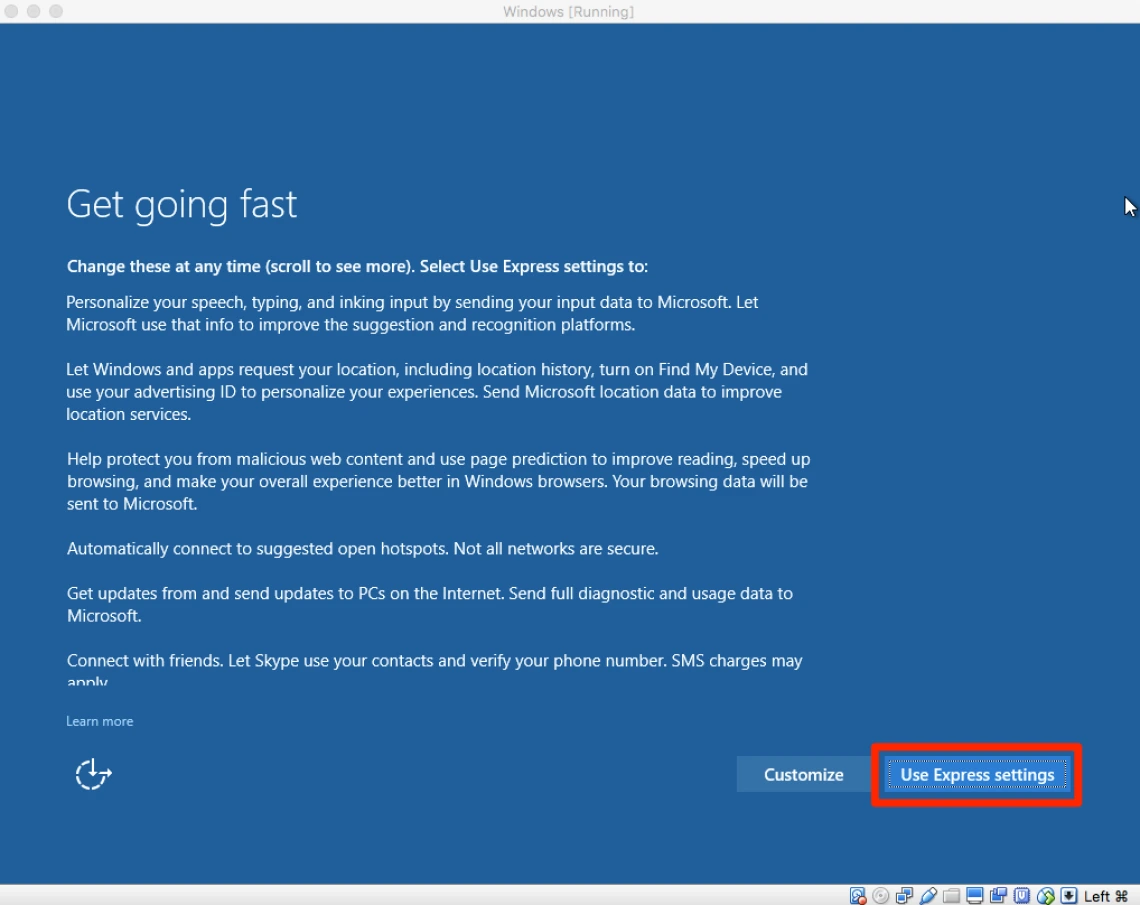
19. After the installation is complete, we need to configure the system. Click the Use Express settings button.
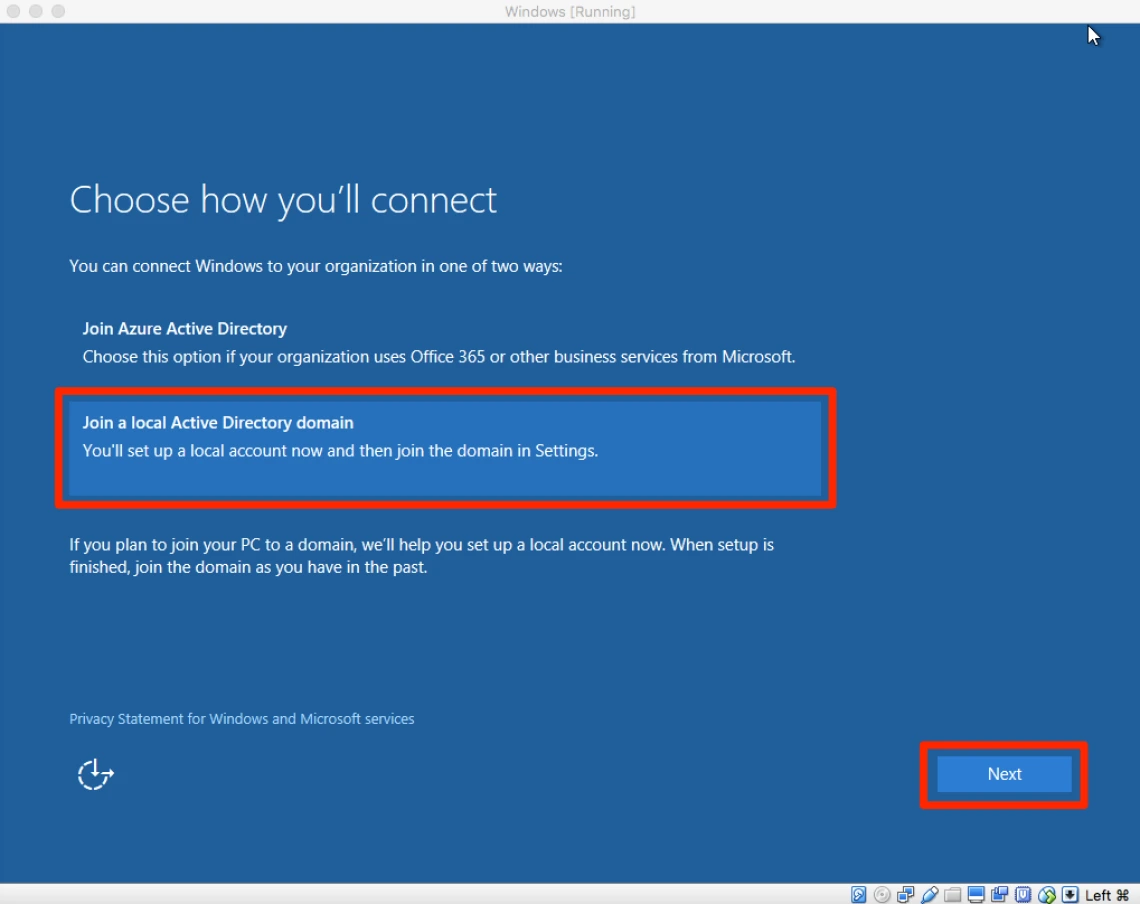
20. Select the Join a local Active Directory domain option and Click the Next button.
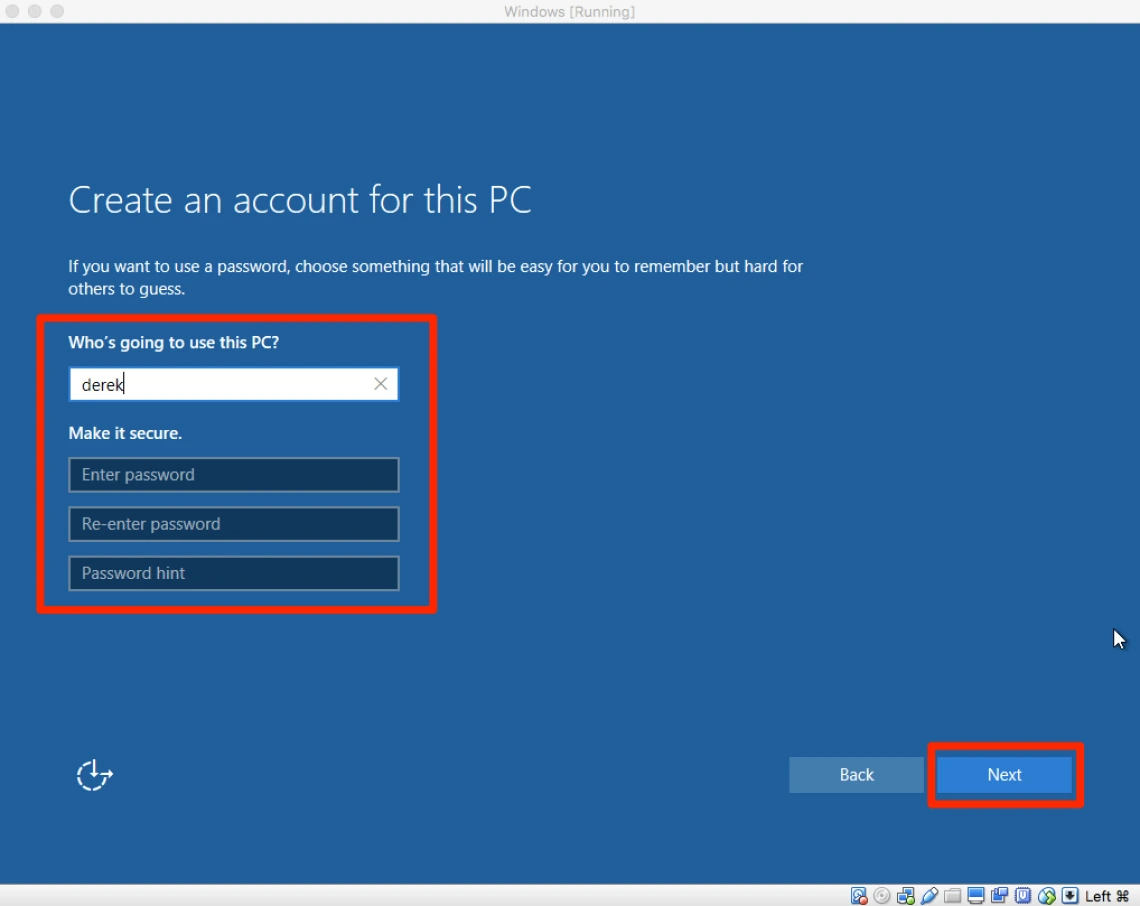
21. Create a Username and Password for the Windows 10 VM user account.
22. The system will now reboot and be ready for first time use. You can log in with the credentials created in the previous step.
If prompted to enable Network Discovery, click the No button.
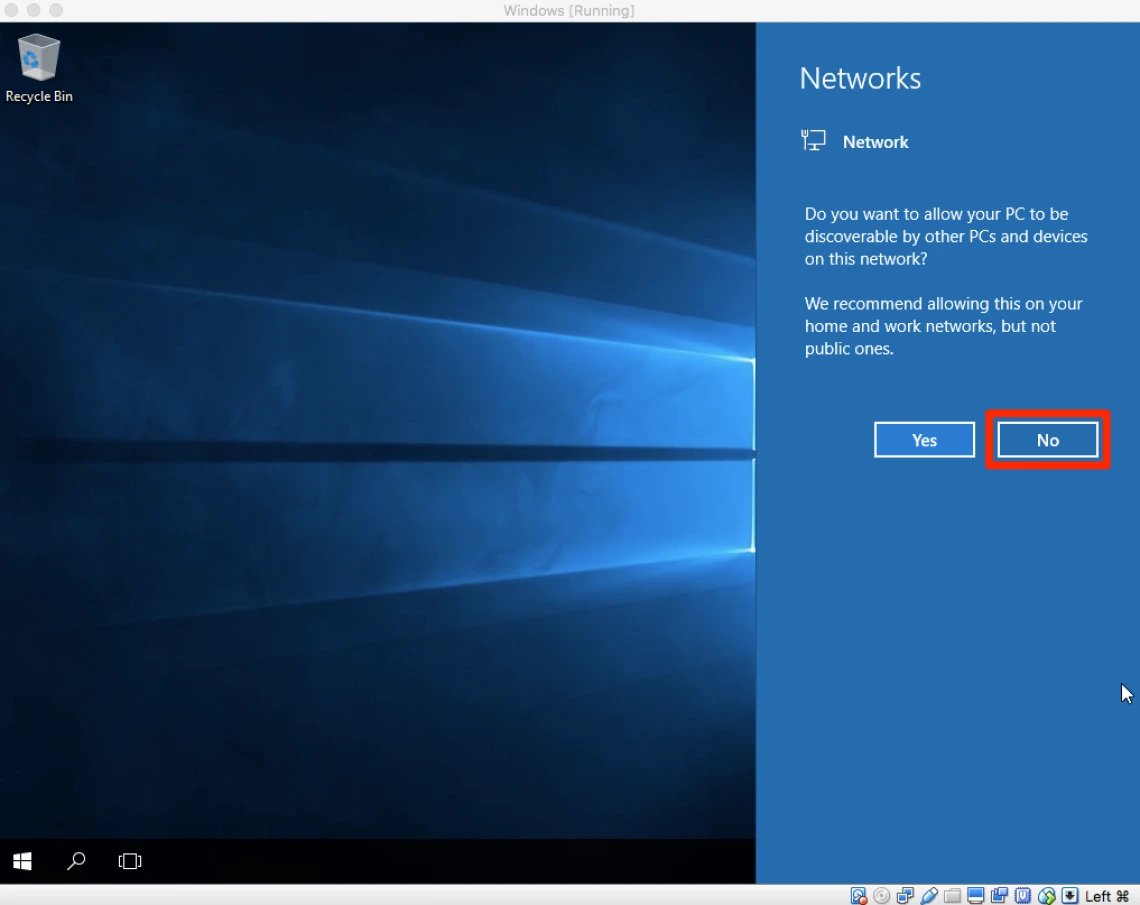
You now have a basic Windows 10 VM.
Phase 4. Installing Office 365 in Windows 10 virtual machine
Office 365 is available for free to students at the University of Arizona. To find out more about this program, see the University of Arizona BookStores Office 365 page.
To download Office 365, please complete the following steps within the Windows 10 virtual machine:
1. Click on https://portal.office.com/ to go to the Office 365 download webpage.
2. Enter your University of Arizona Email Address.
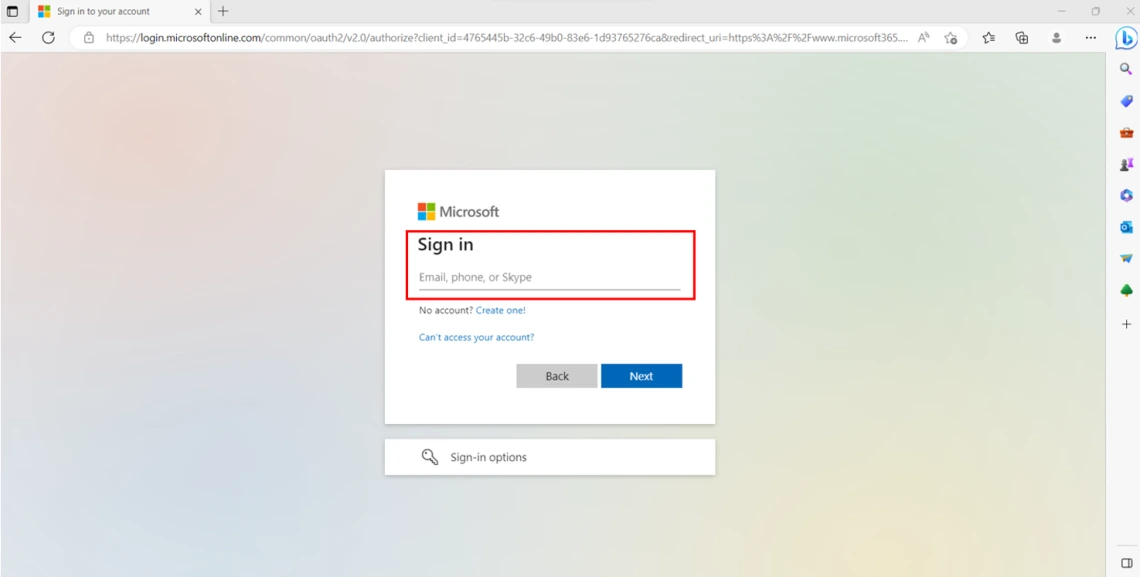
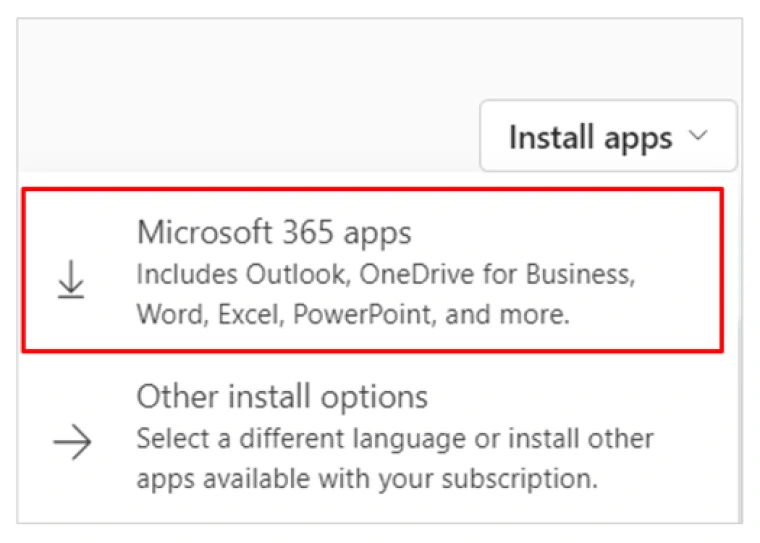
3. Click the Install Apps button.

4. Click the Microsoft 365 apps button to start the download.
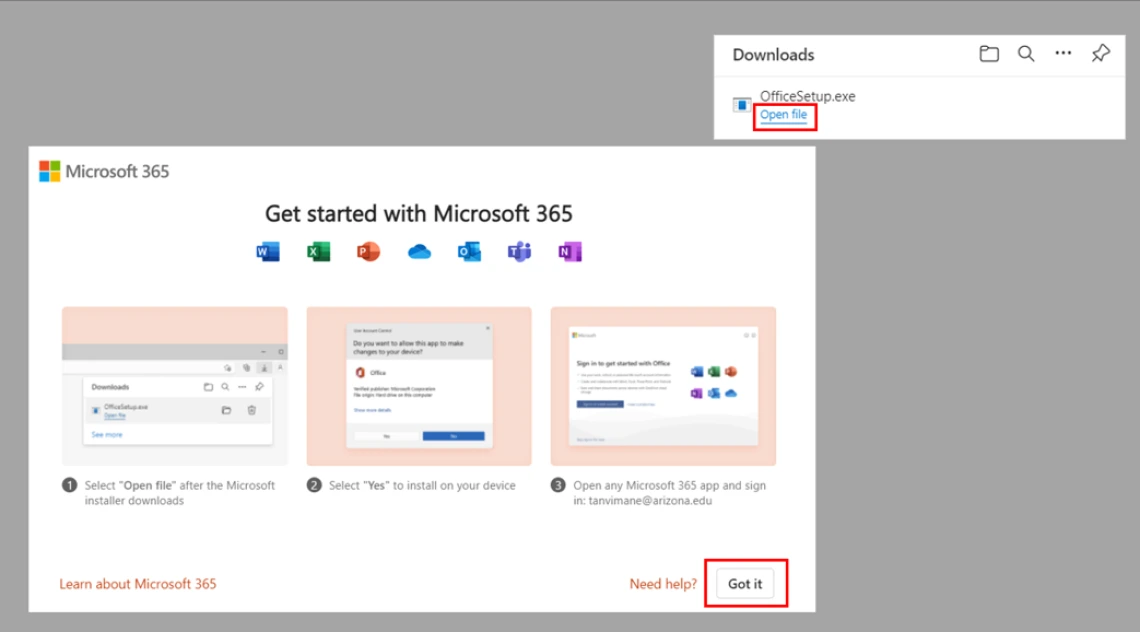
5. Click the Got it button and click the Open file button. Alternatively, open the OfficeSetup.exe file from your Downloads folder.
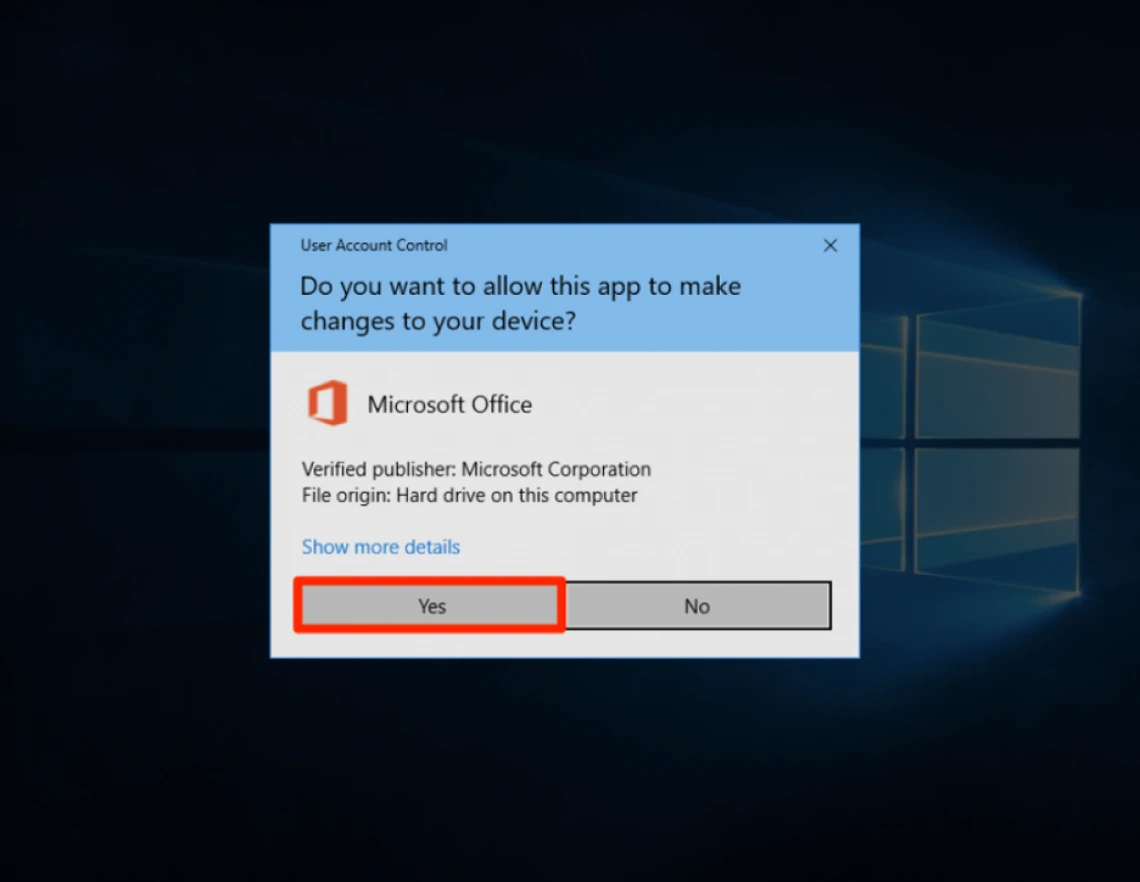
6. Click the Yes button on the User Account Control prompt to allow the installer to make changes to the system.
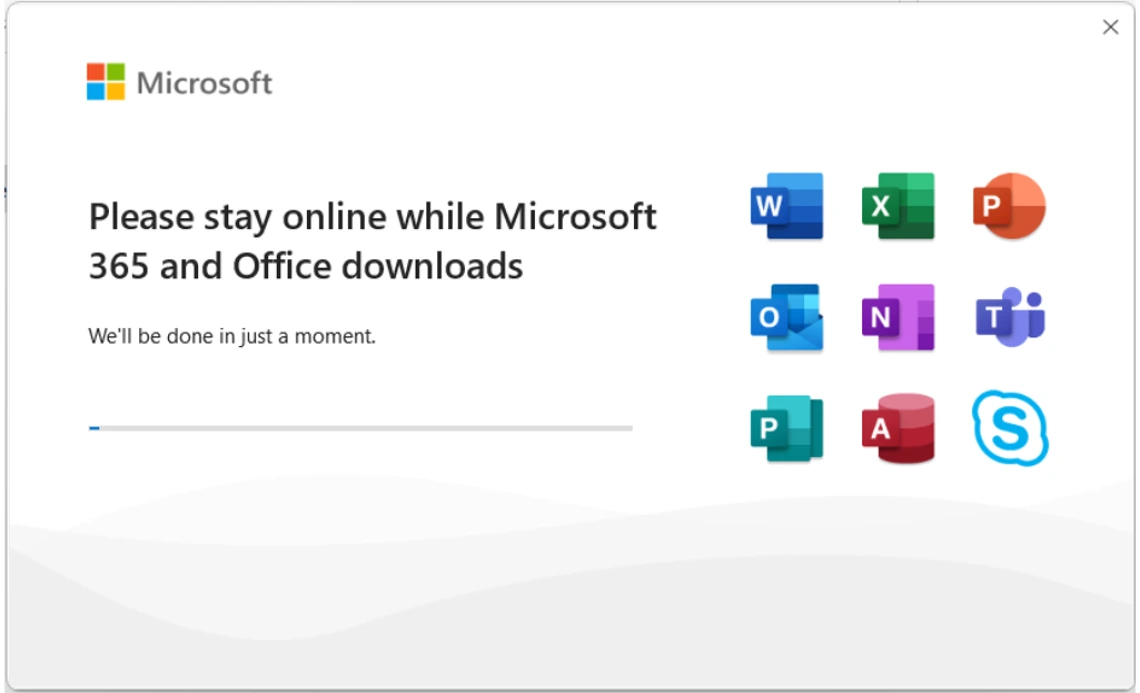
7. Office 365 is being downloaded and installed. This will take a some time to complete.
8. When the installation of Office 365 completes successfully, click the Close button to exit the installer.
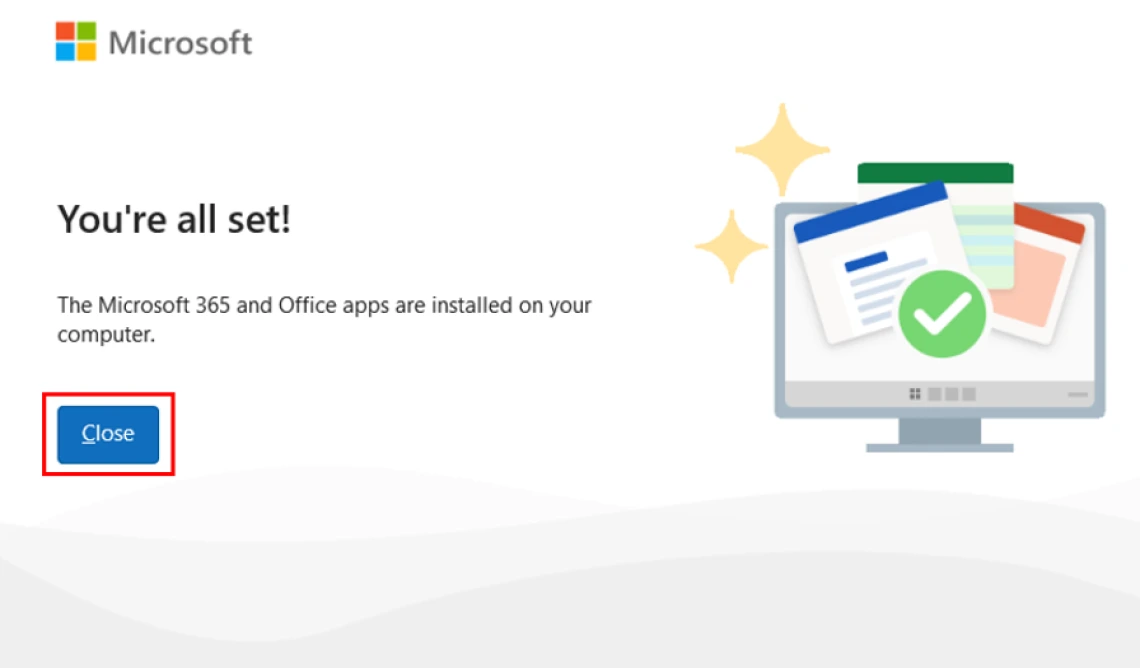
You now have a functional Windows 10 virtual machine with Office 365. Congratulations!
You should Update your machine to install the latest critical and security patches to Windows and Office 365.
You can do this by clicking Start and typing Windows Update and stepping through the wizard.
Assuming you have enough space, you can install other software in this VM as well. As an MIS student, you can use Microsoft Visio and Project in the course of your studies. We have guides on how to install those titles on our Instructions + Documentation page.
Phase 5. Install software updates
To install updates for Windows 10 and other Microsoft products, like Office 365:
1. Click the Start button.
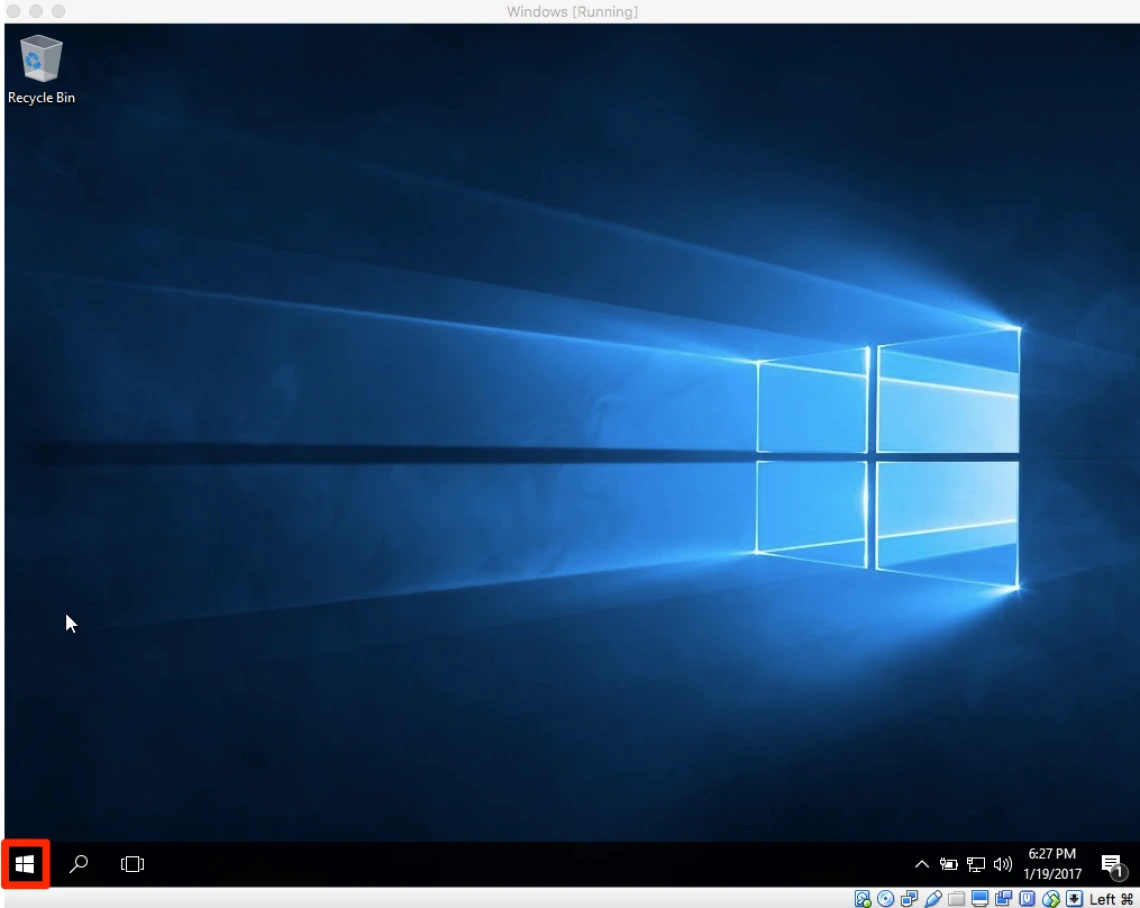
2. Type Windows Update and click the Check for updates option.
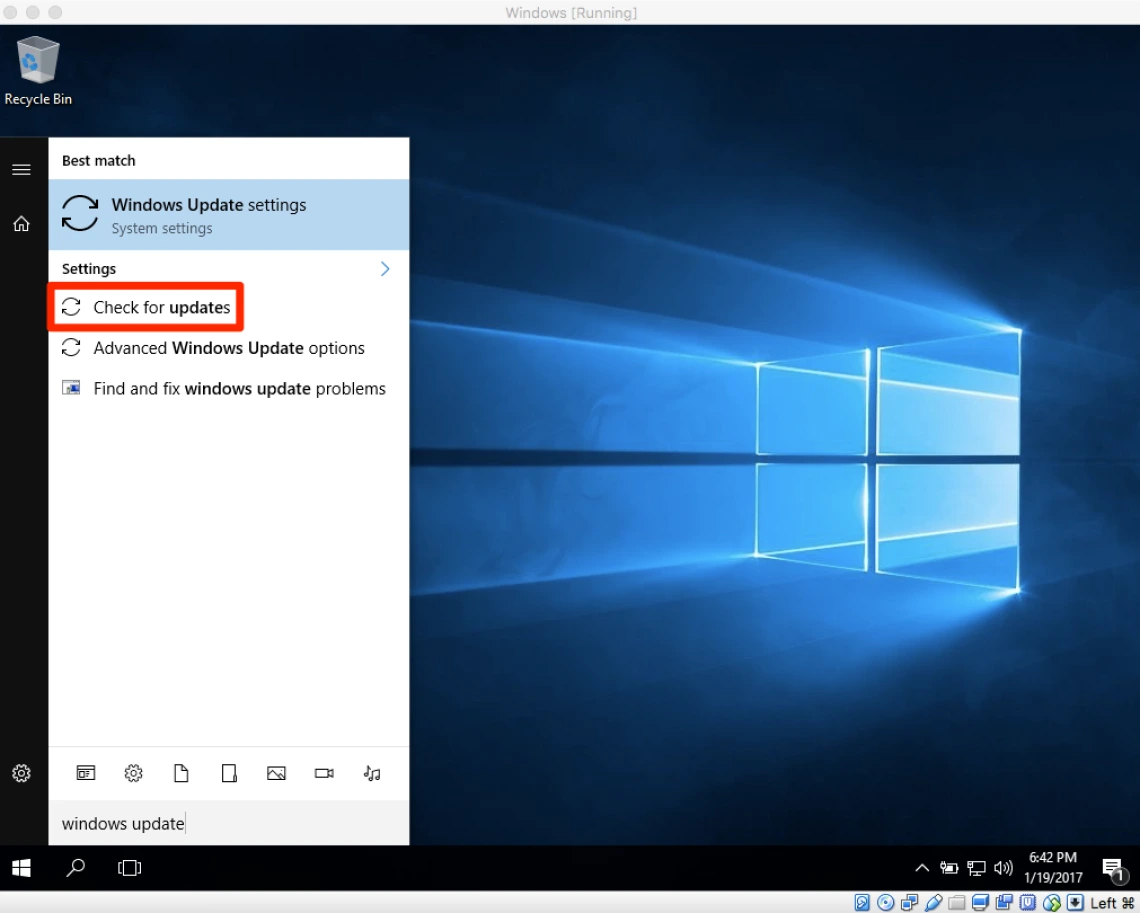
3. Windows 10 is now checking for updates, this may take a few minutes.
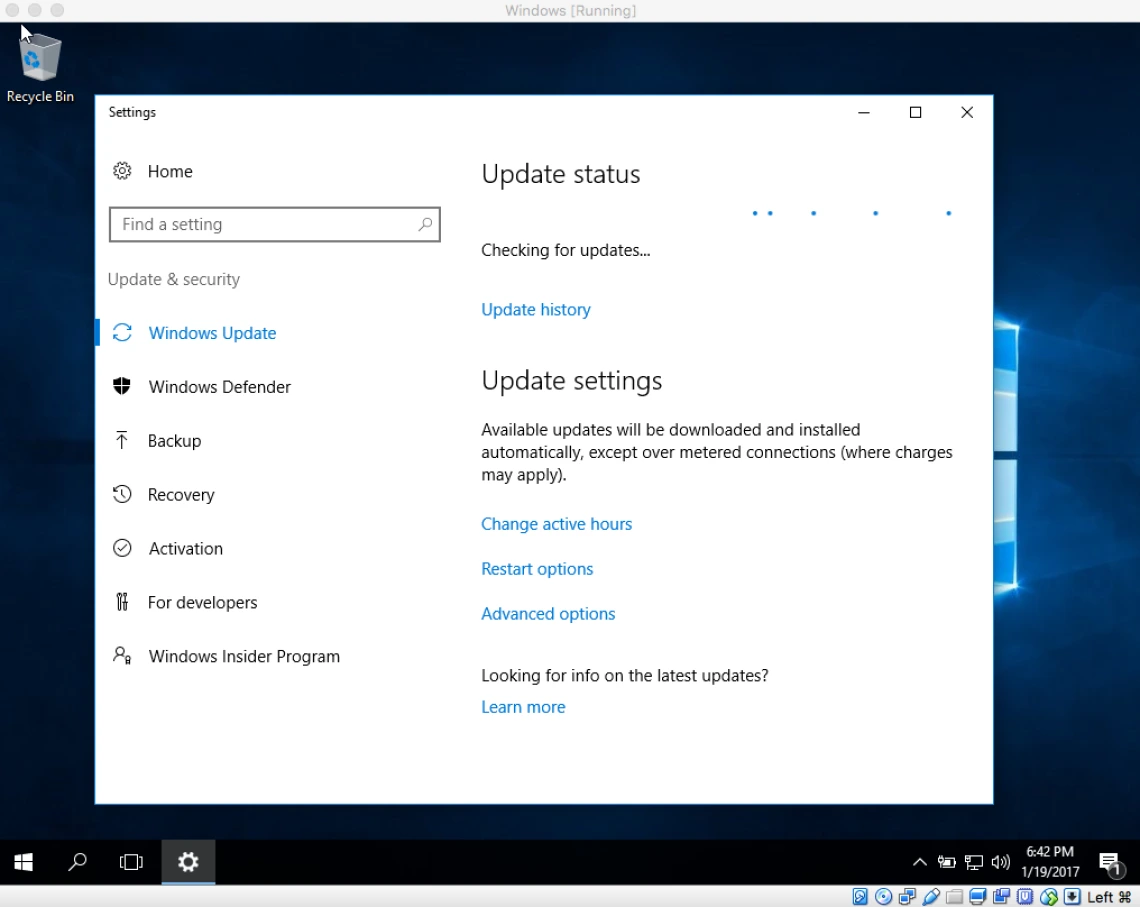
4. If Windows 10 finds any updates, they will begin installing. This process may take significant time if there are many updates to apply.
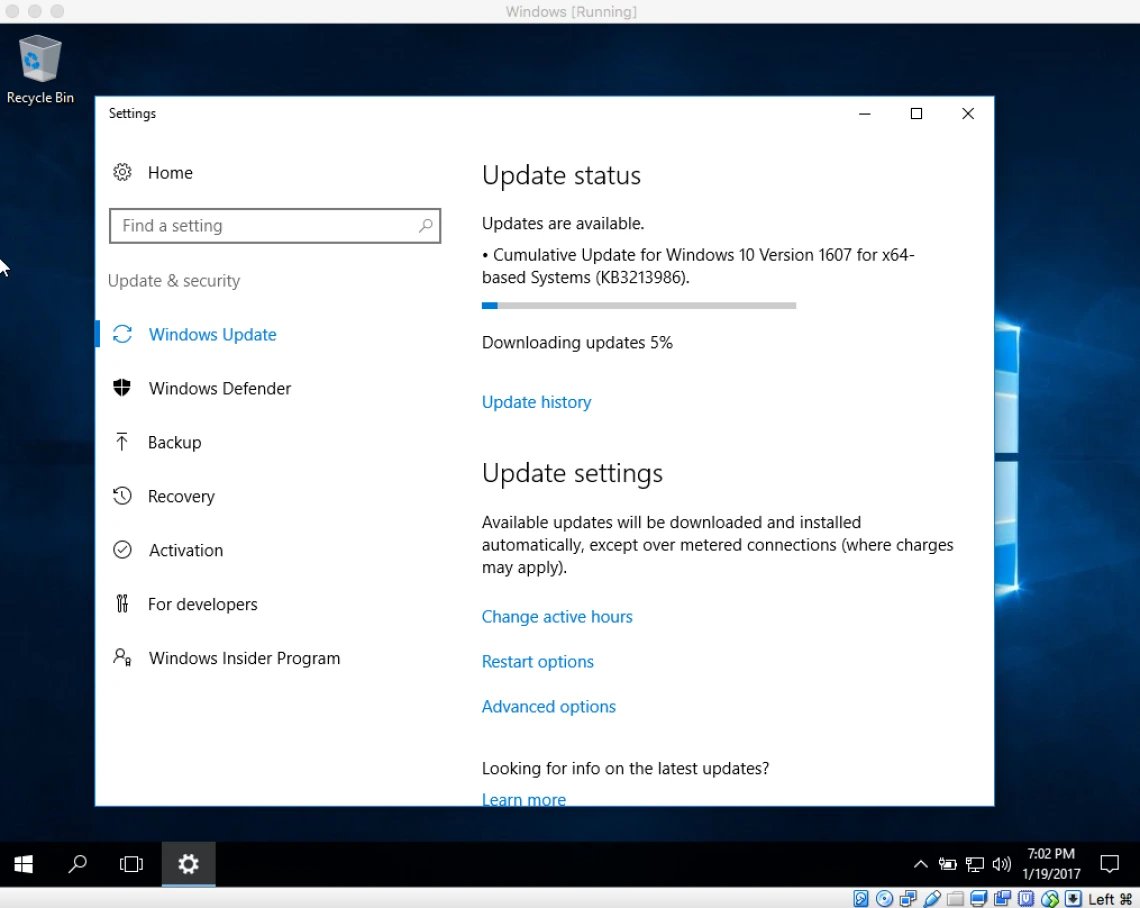
5. After installing the updates, Windows 10 may need to be restarted. Click the Restart now button.
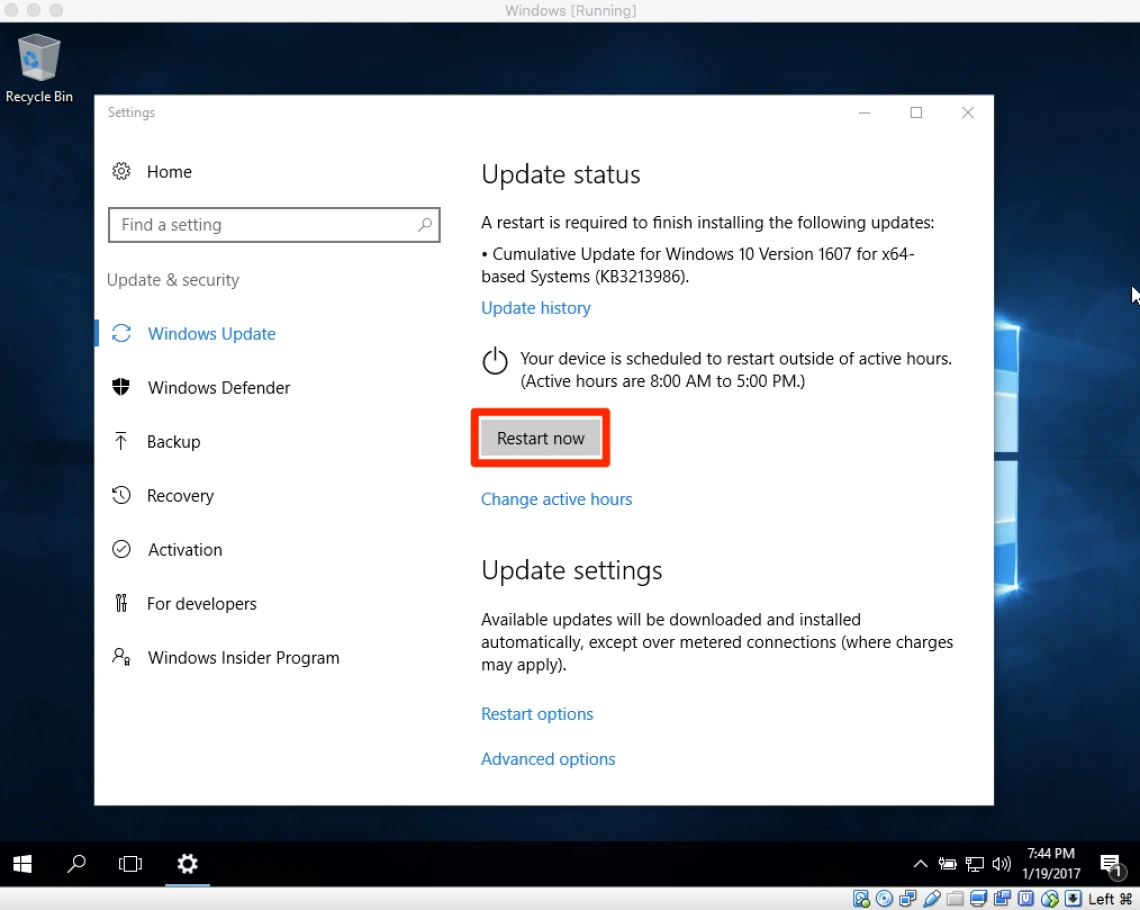
6. After Windows 10 restarts, it may return to the Windows Update status window. You may want to Check for updates one more time to make sure the system is up-to-date.
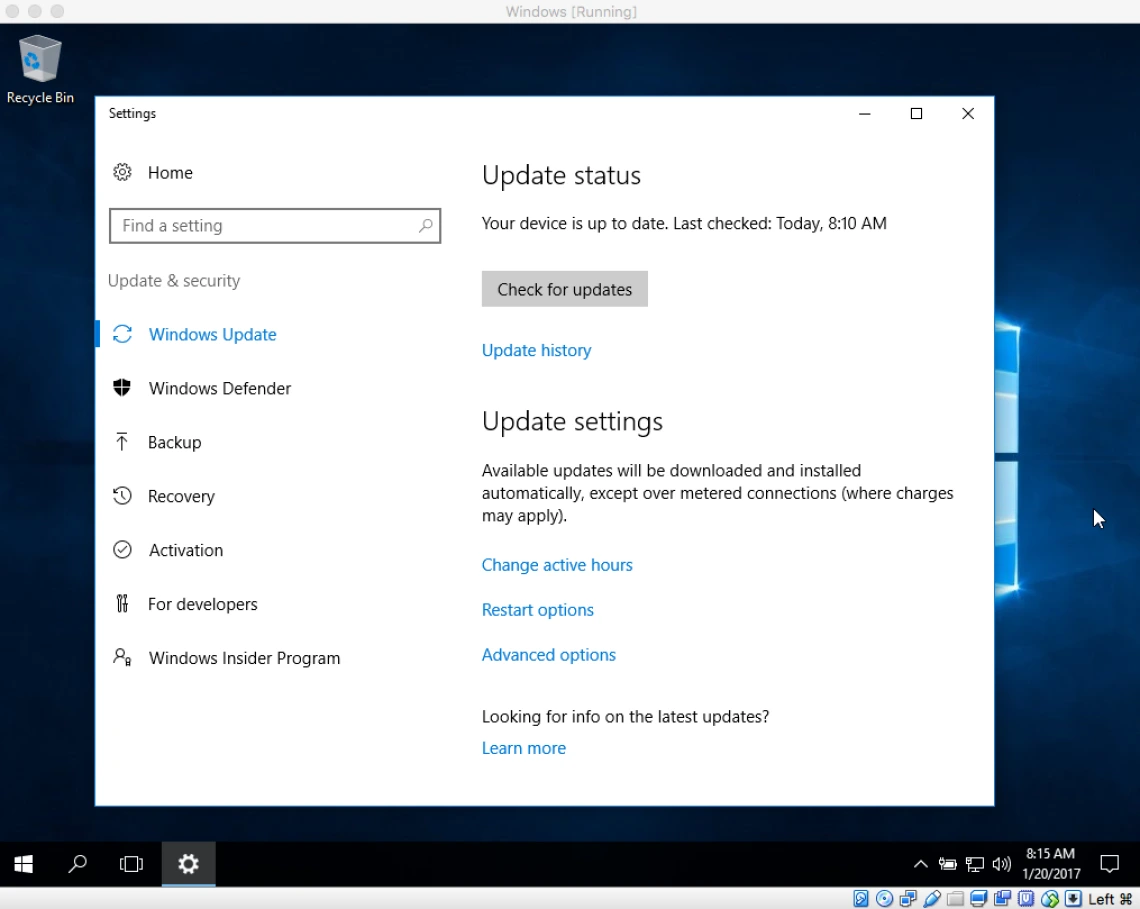
Your Windows 10 VM is now up-to-date and ready for use.

